

Virtual Terminal
Processing a Sale
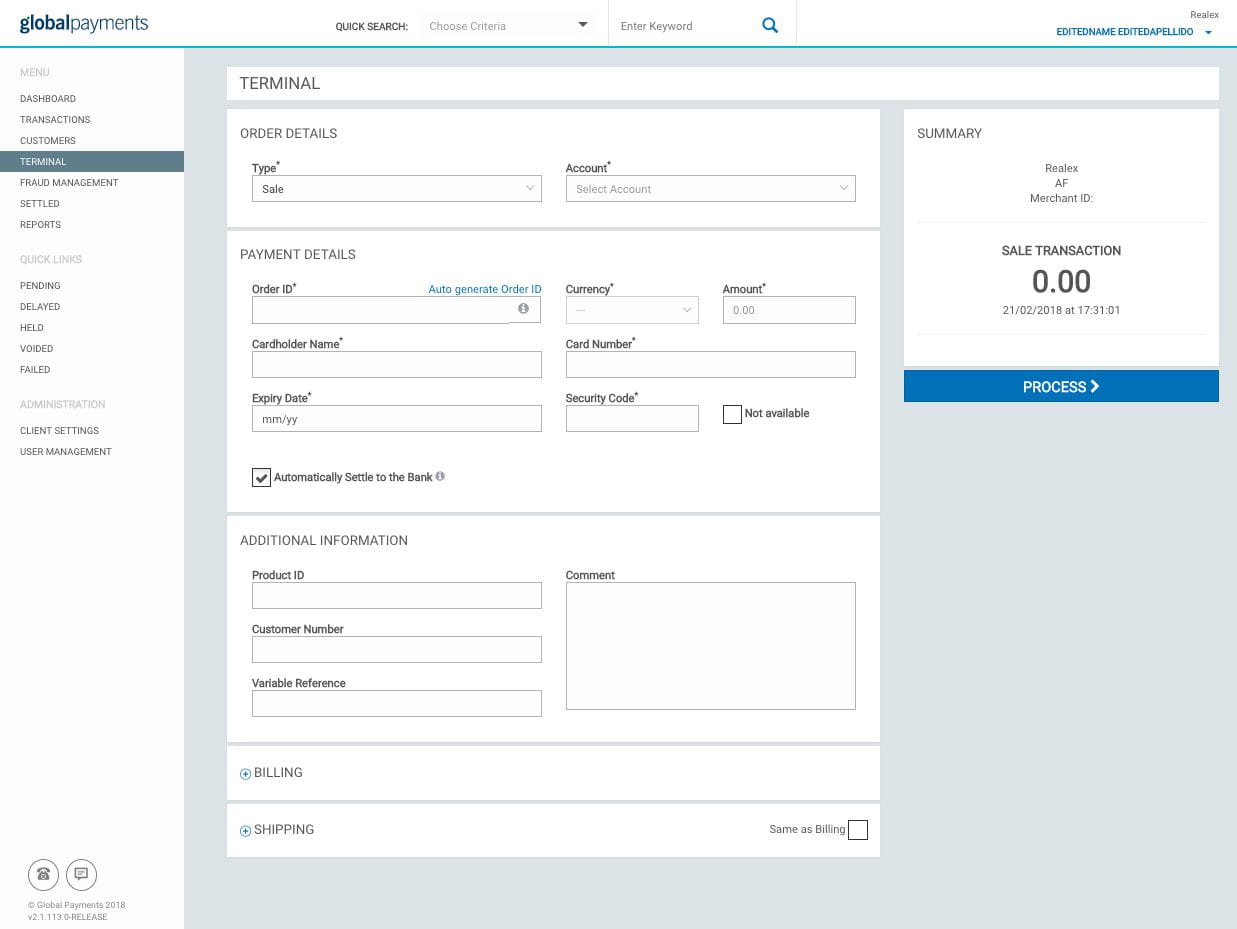
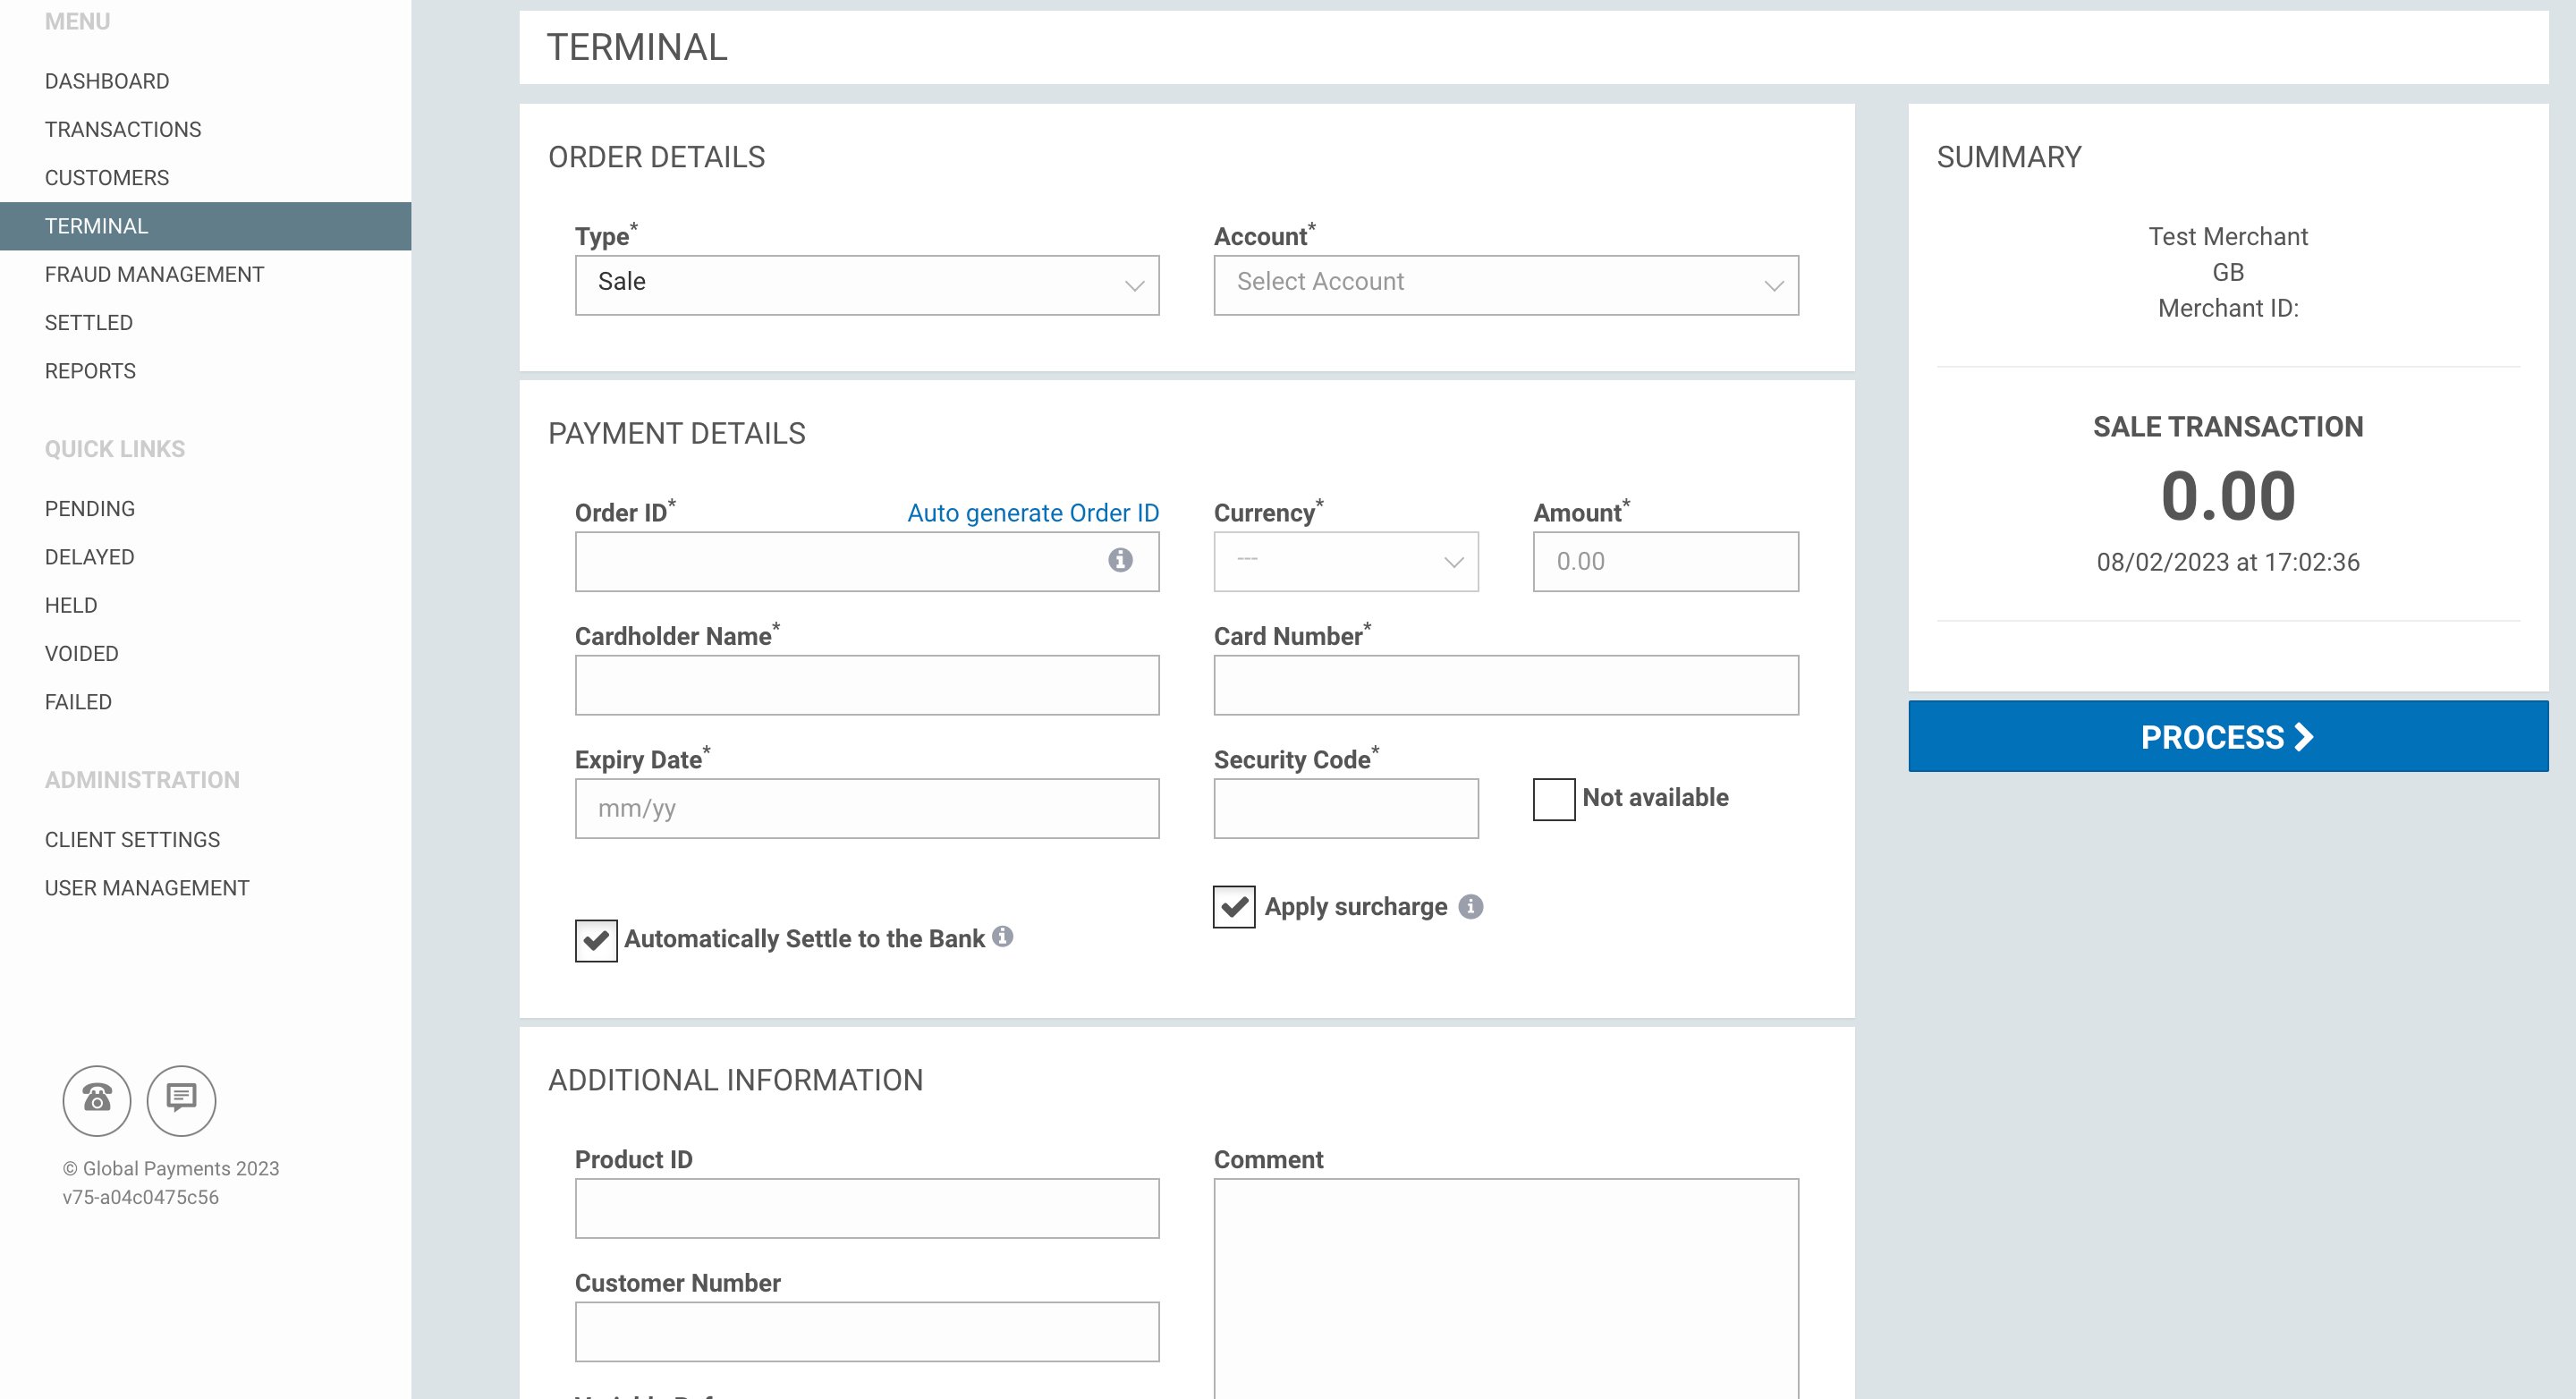
In order to process a ‘Sale’, follow the steps below:
Step 1
In the ‘Type’ field choose ‘Sale’ from the dropdown menu.
Step 2
To select a particular sub-account to process the transaction against, choose the ‘Account’ from the dropdown menu. If you have a single sub-account this will be populated by default.
Step 3
All fields marked with an * are mandatory and must be completed to process the transaction.
Step 4
Once all mandatory fields are complete, click on ‘Process’.
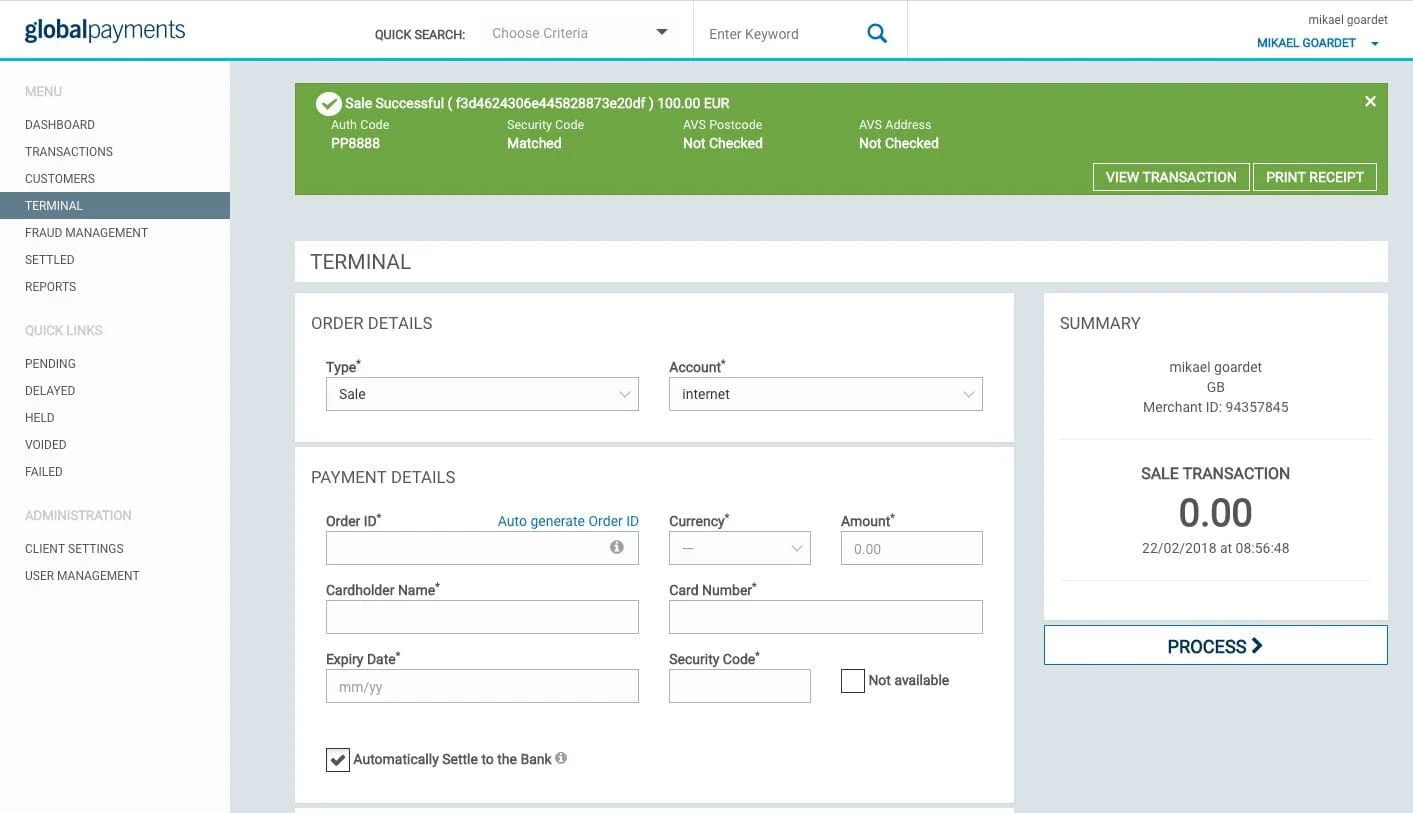
Step 5
The transaction result will display and the appropriate message will appear at the top of the ‘Terminal’ screen.
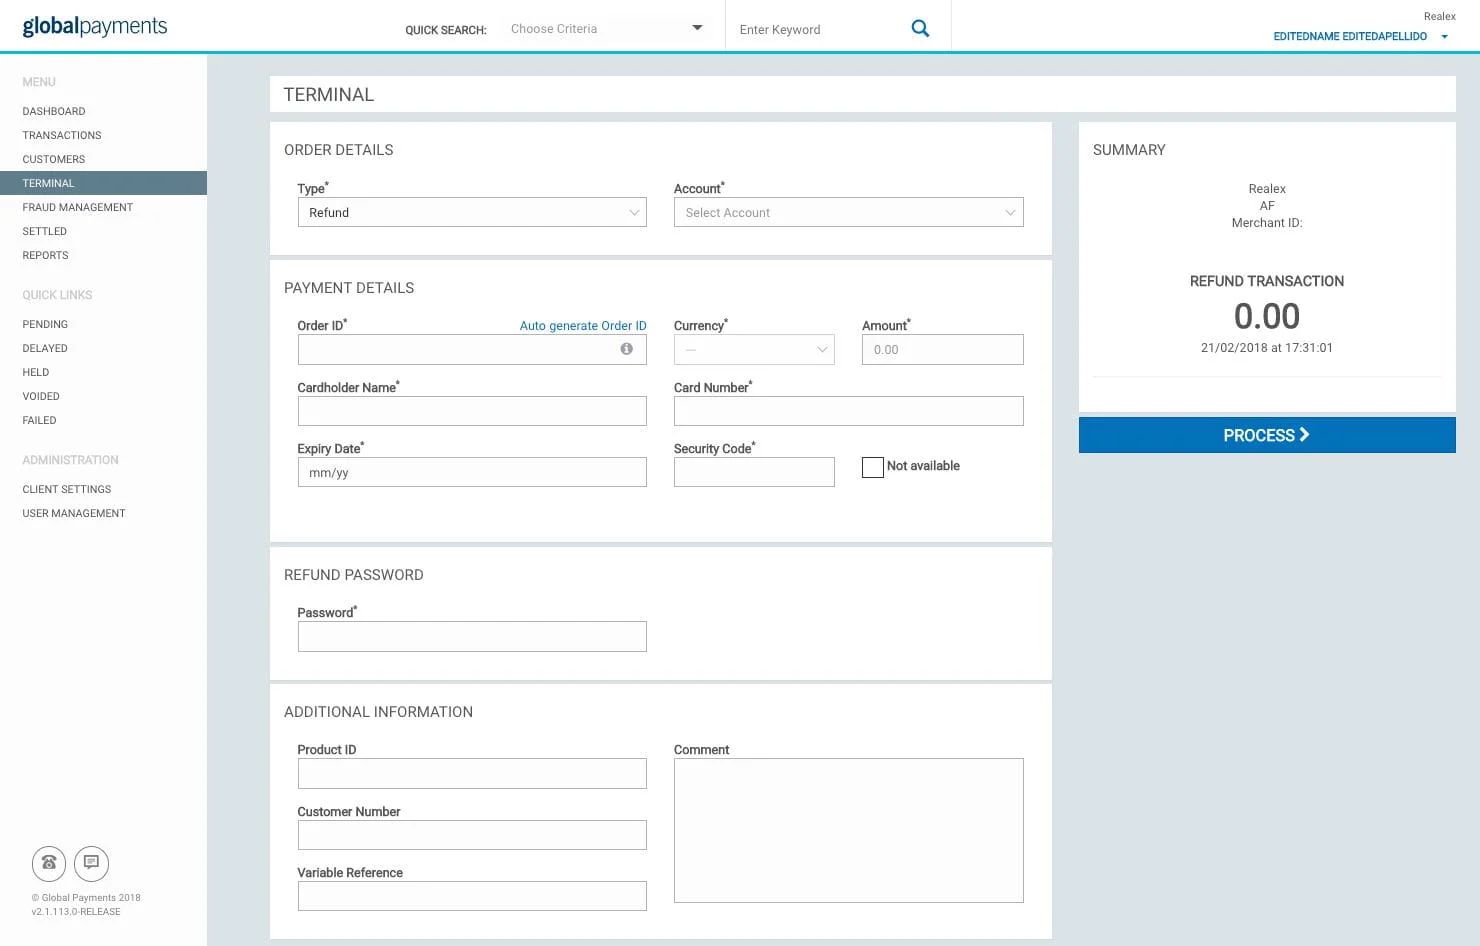
Processing a Refund
To process a ‘Refund’ you will need to have been assigned the role of ‘Administrator’ or ‘Power User’ to gain access to this section of the ‘Terminal’.
Step 1
To process a refund, select ‘Refund’ from the ‘Type’ dropdown.
Step 2
To select a particular sub-account, choose the sub-account from the ‘Account’ dropdown. If you have a single sub-account this will be populated by default.
Step 3
All fields marked with an * are mandatory and must be completed to process the transaction.
Step 4
You will be required to enter your personal login password as this is a mandatory field.
Step 5
Once all mandatory fields are complete, click on ‘Process’.
Step 6
The transaction result will display and the appropriate message will appear at the top of the ‘Terminal’ screen as seen in Section 1.1 above.
Note:
- Please note that the refund option is not enabled by default on your account. For more information on this please contact Global Payments Support Team.
- You need to have the full card number and expiry date to process a refund. If you do not have these details and the transaction is less than 180 days old, you should process a rebate. For more information on rebates, please see the RealControl – Managing Transactions User Guide.
Manual Transactions
To process a ‘Manual’ transaction you will need to have been assigned the role of ‘Administrator’ or ‘Power User’ to gain access to this section of the Terminal.
Note:
Manual transactions are not sent to the bank for authorisation, instead they are added directly to the days settlement file. To process a manual transaction you must contact your acquiring bank’s authorisation centre by phone to obtain an authorisation code. Global Payments requires written confirmation from your acquiring bank before this transaction type can be enabled on your account.
Step 1
To process a manual transaction, select ‘Manual’ from the ‘Type’ dropdown.
Step 2
To select a particular sub-account, choose the sub-account from the ‘Account’ dropdown. If you have a single sub-account this will be populated by default.
Step 3
All fields marked with an * are mandatory and must be completed to process the transaction.
Step 4
A manual transaction requires you to input a two to six digit alphanumeric code as evidence of authorisation. This code is entered in the ‘Auth Code’ field as below:

Step 5
Once all mandatory fields are complete, click on ‘Process’.
Step 6
The transaction result will display and the appropriate message will appear at the top of the ‘Terminal’ screen as seen in Section 1.1 above.
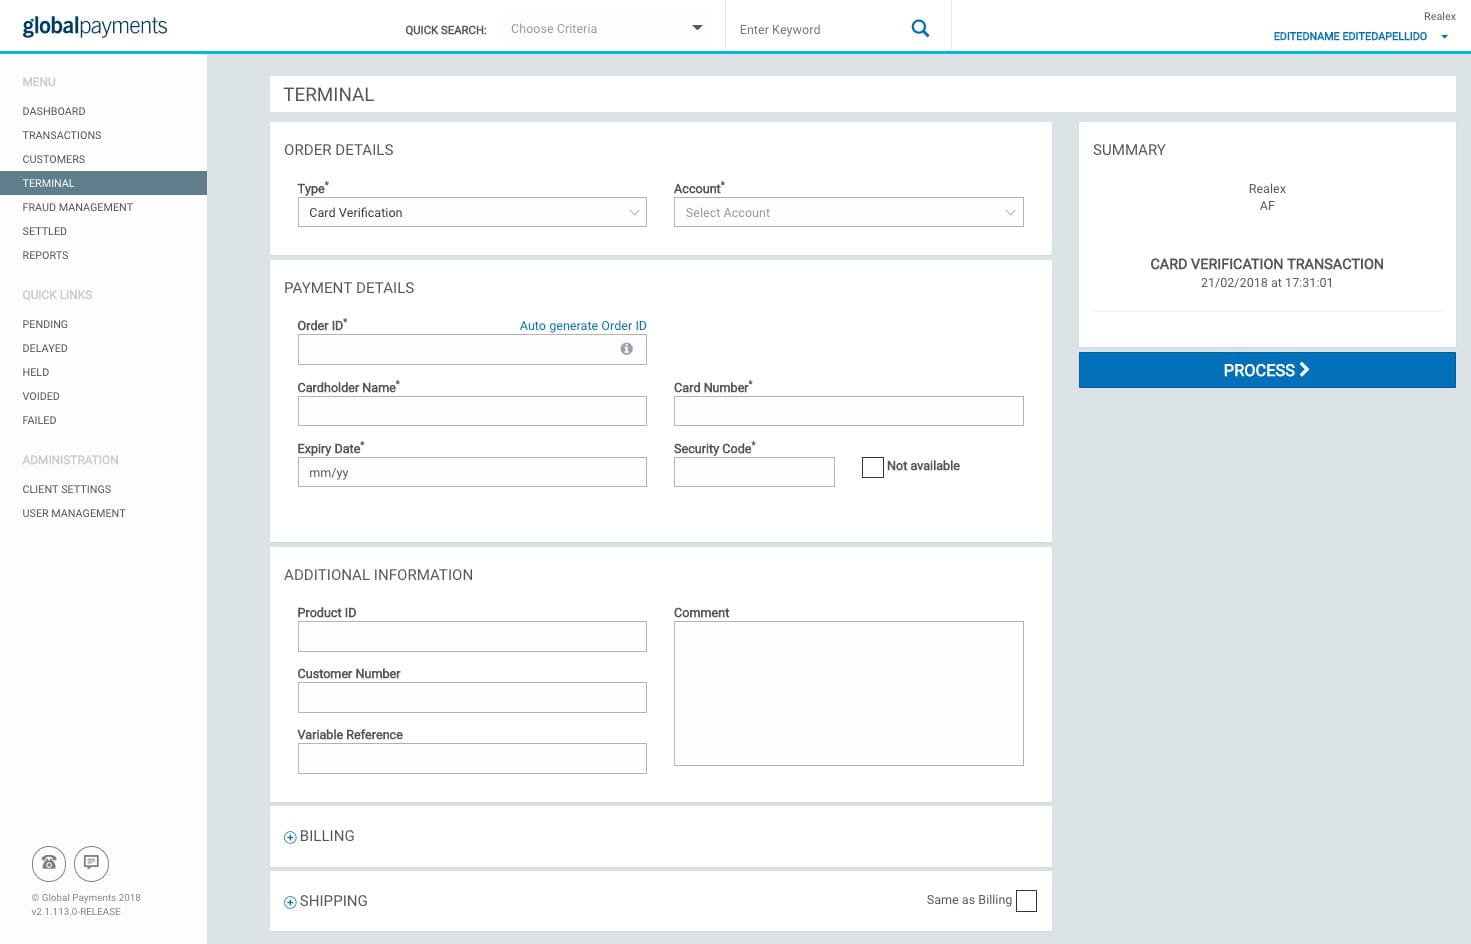
Card Verification
To process a ‘Card Verification’ transaction you will need to have been assigned the role of ‘Administrator’ or ‘Power User’. The ‘Card Verification’ transaction type is used to check that a card is valid and active without authorising or holding funds.
Note:
Card Verification is not supported by all acquiring banks, to determine if your acquiring bank supports card verification, please contact Global Payments Support Team for further information.
Step 1
To process a card verification transaction, select ‘Card Verification’ from the ‘Type’ dropdown.
Step 2
To select a particular sub-account, choose the sub-account from the ‘Account’ dropdown. If you have a single sub-account this will be populated by default.
Step 3
All fields marked with an * are mandatory and must be completed to process the transaction.
Step 4
Once all mandatory fields are complete, click on ‘Process’.
Step 5
The transaction result will display and the appropriate message will appear at the top of the ‘Terminal’ screen as seen in Section 1.1 above.
Set surcharge amount
Your Virtual Terminal lets you apply a surcharge fee on commercial debit and credit cards. The surcharge fee you apply must always be less than the amount it costs you to accept the card transaction.
Step 1
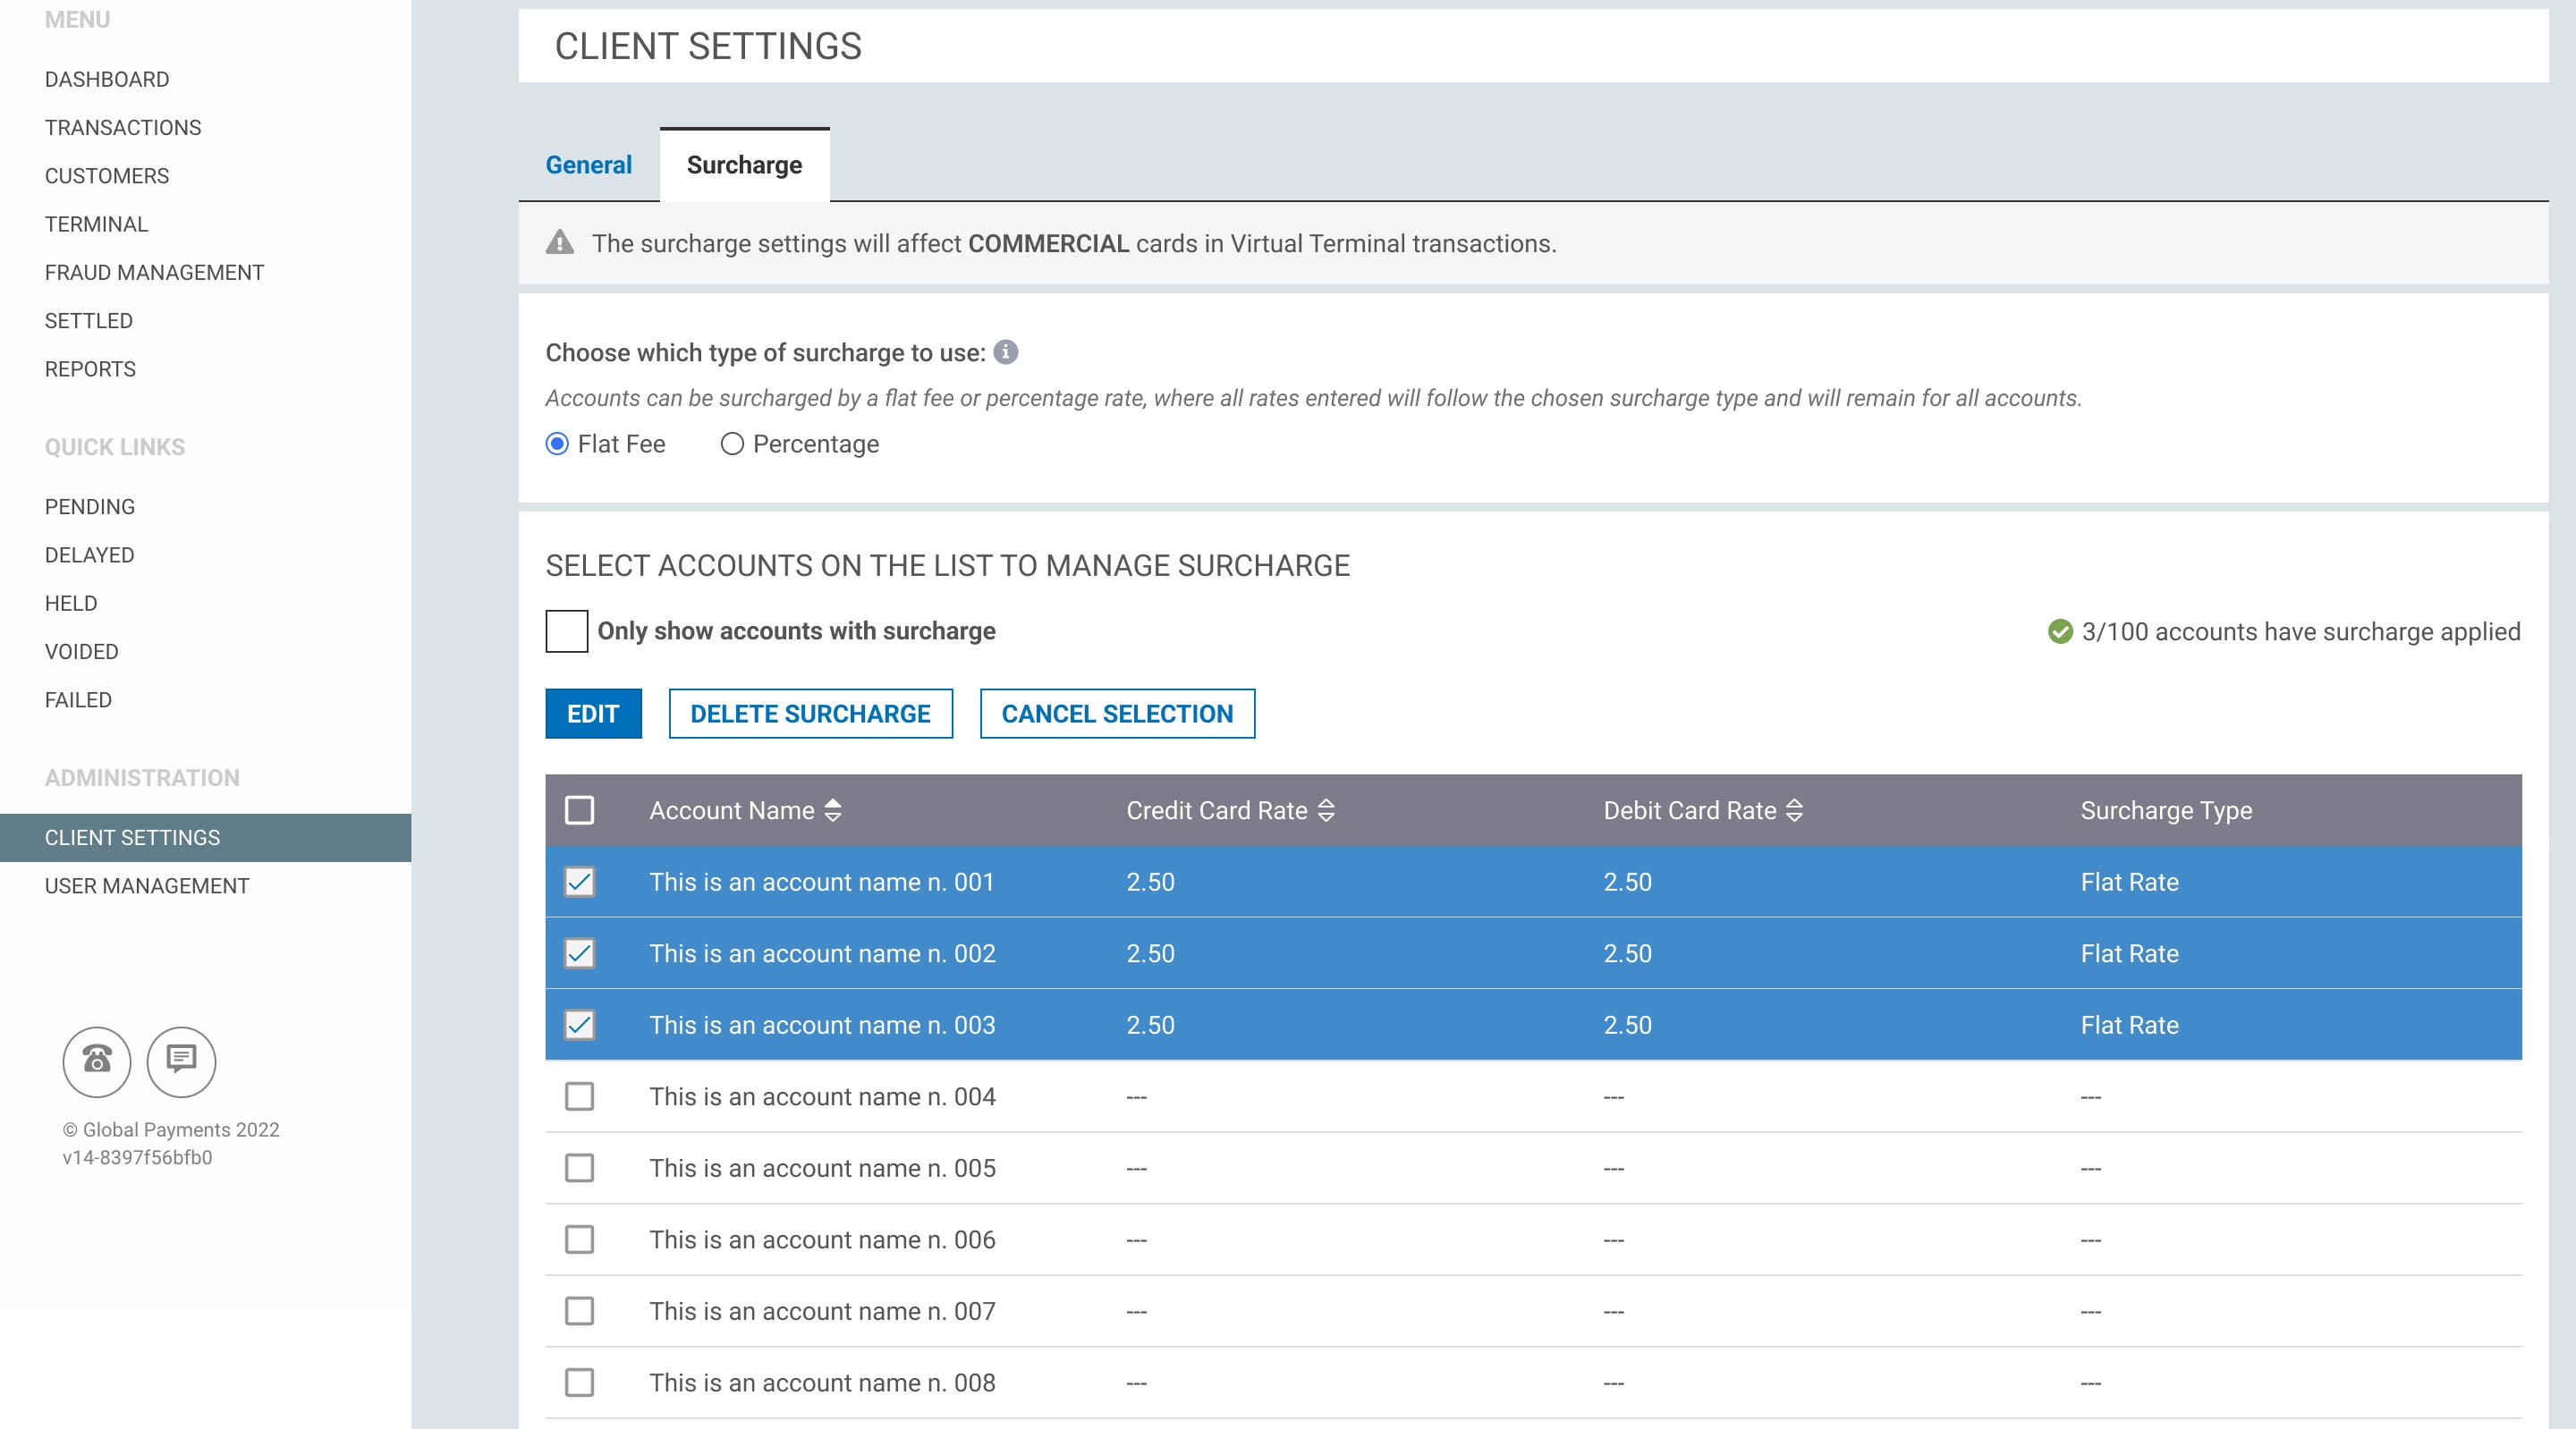
To set your surcharge percentage/flat fee amount, from the main navigation menu in RealControl click on ‘Client Settings’.
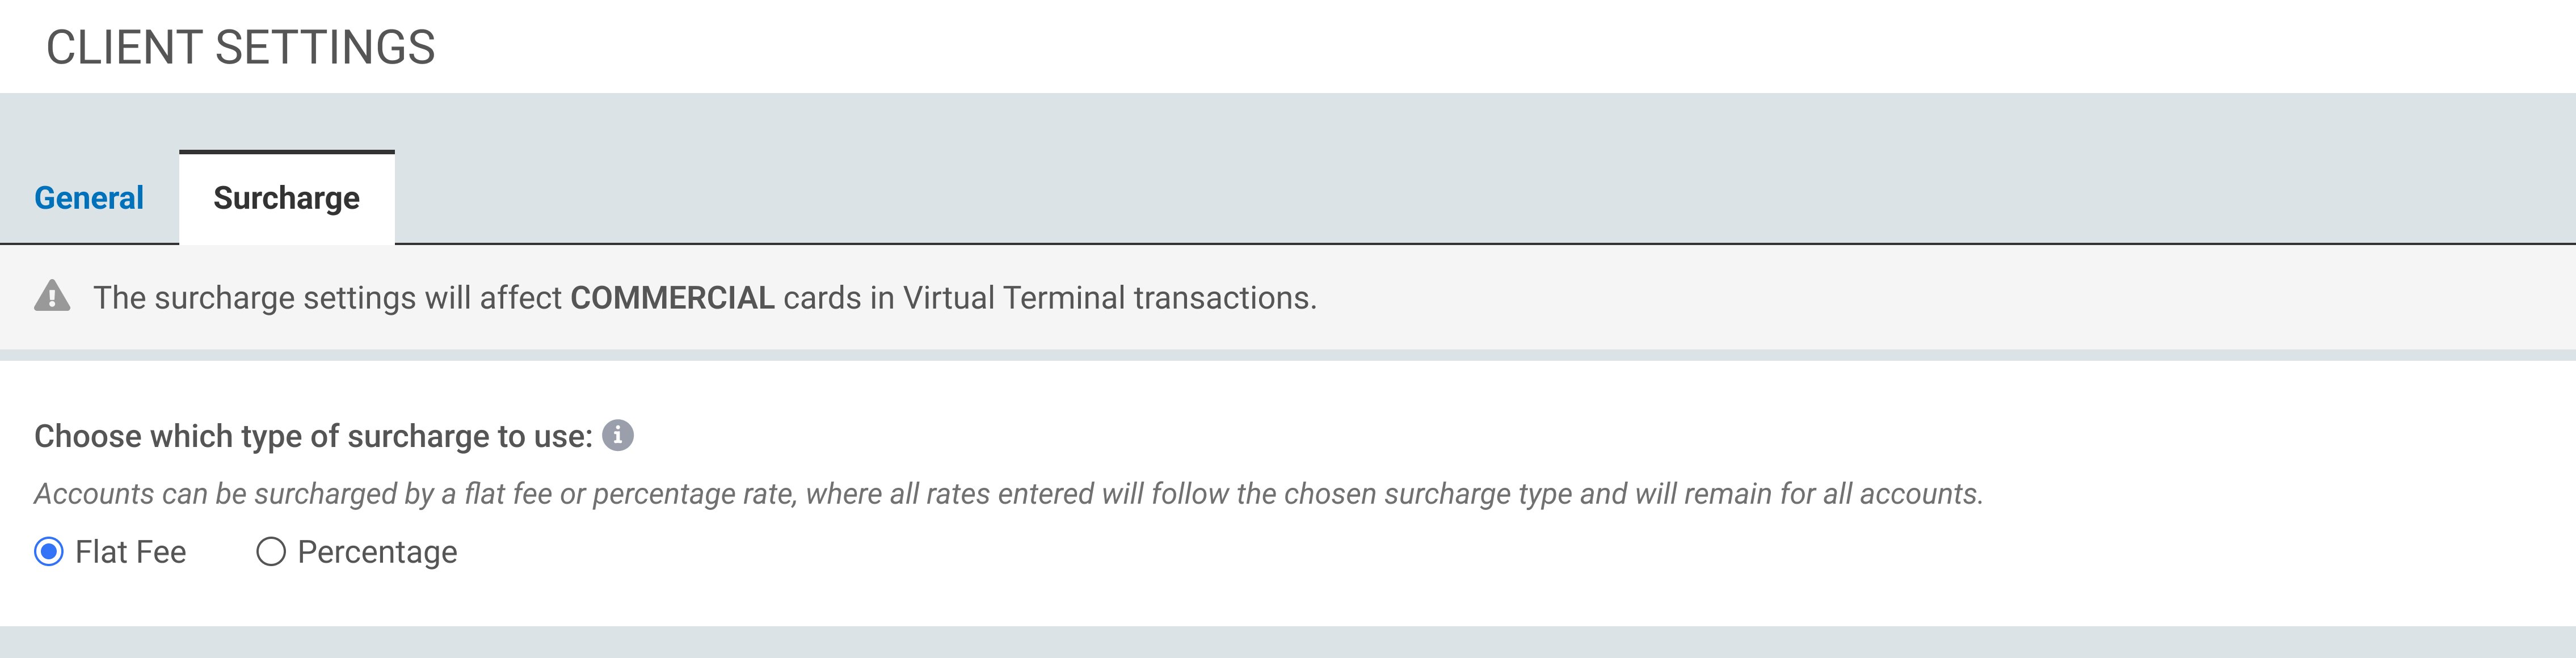
Step 2
In the ‘Client Settings’ section under the ‘Surcharge’ tab, you’ve got the option of choosing ‘Flat Fee’ or ‘Percentage’.
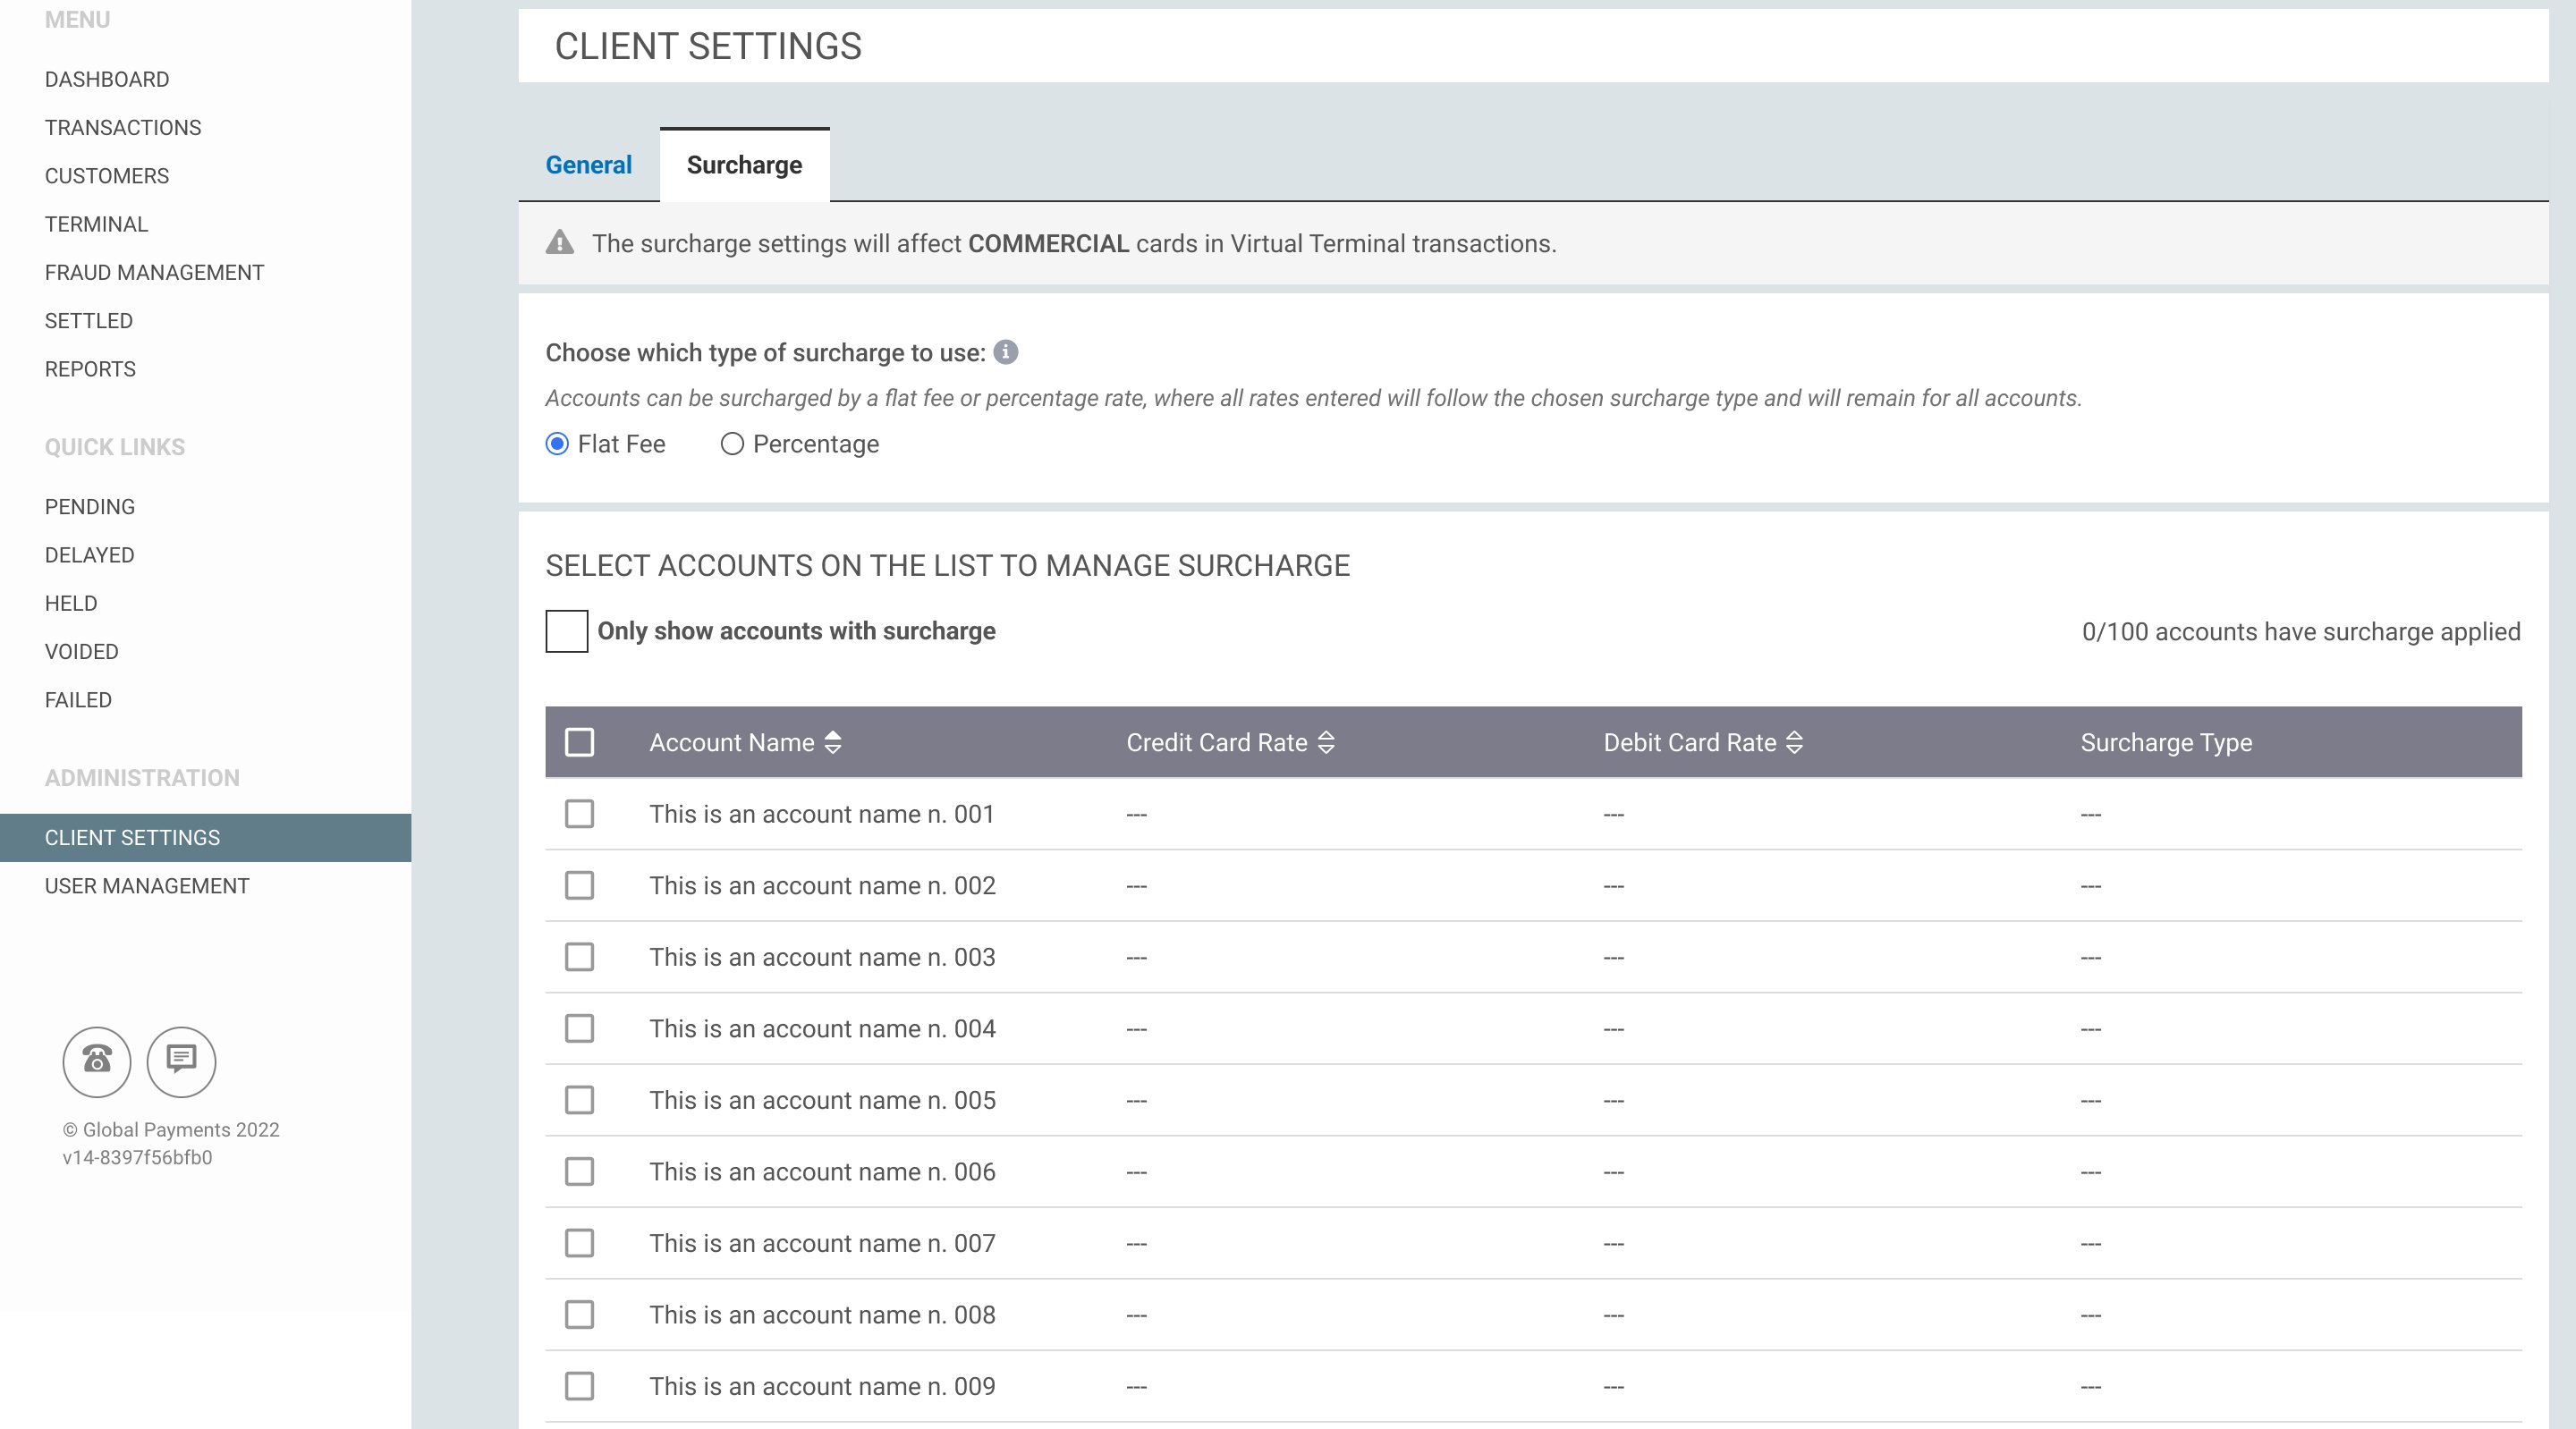
Step 3
You then need to select the accounts you want to apply the surcharge to by clicking on the tick boxes on the left.
Step 4
Enter the surcharge amount in the fields ‘Credit Card’ and/or ‘Debit Card’ and click ‘Apply Surcharge’ to save.
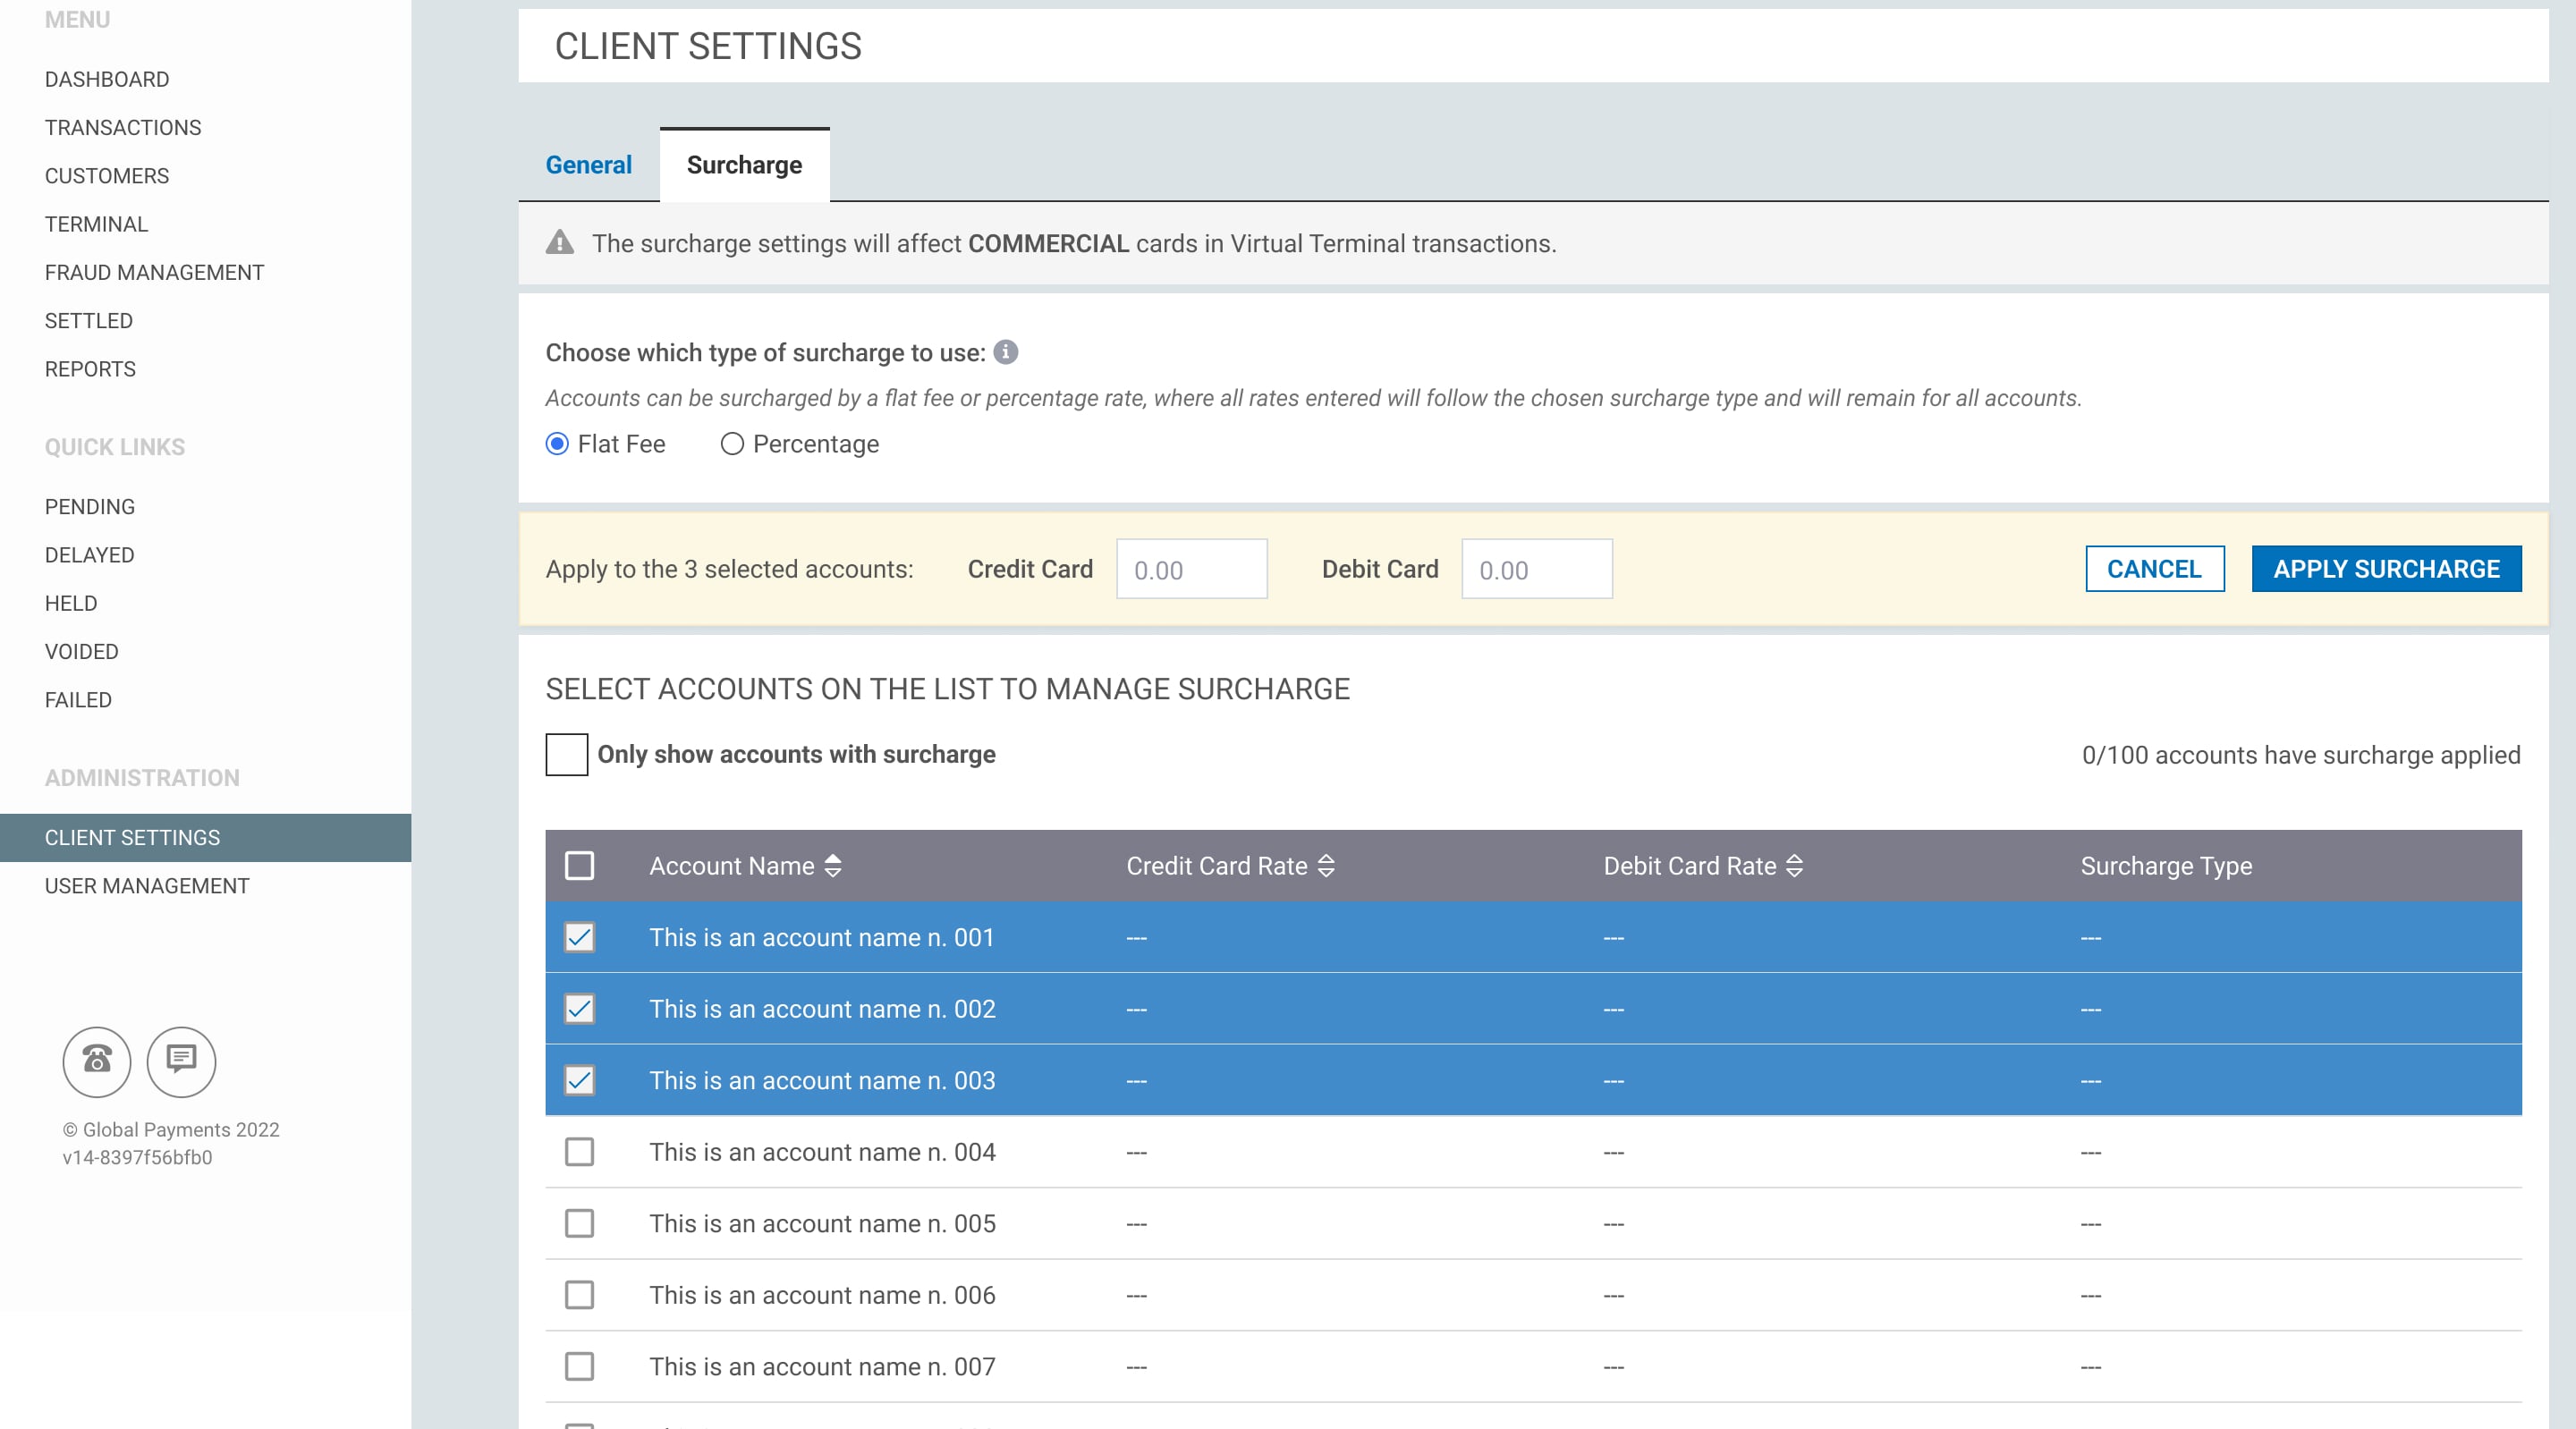
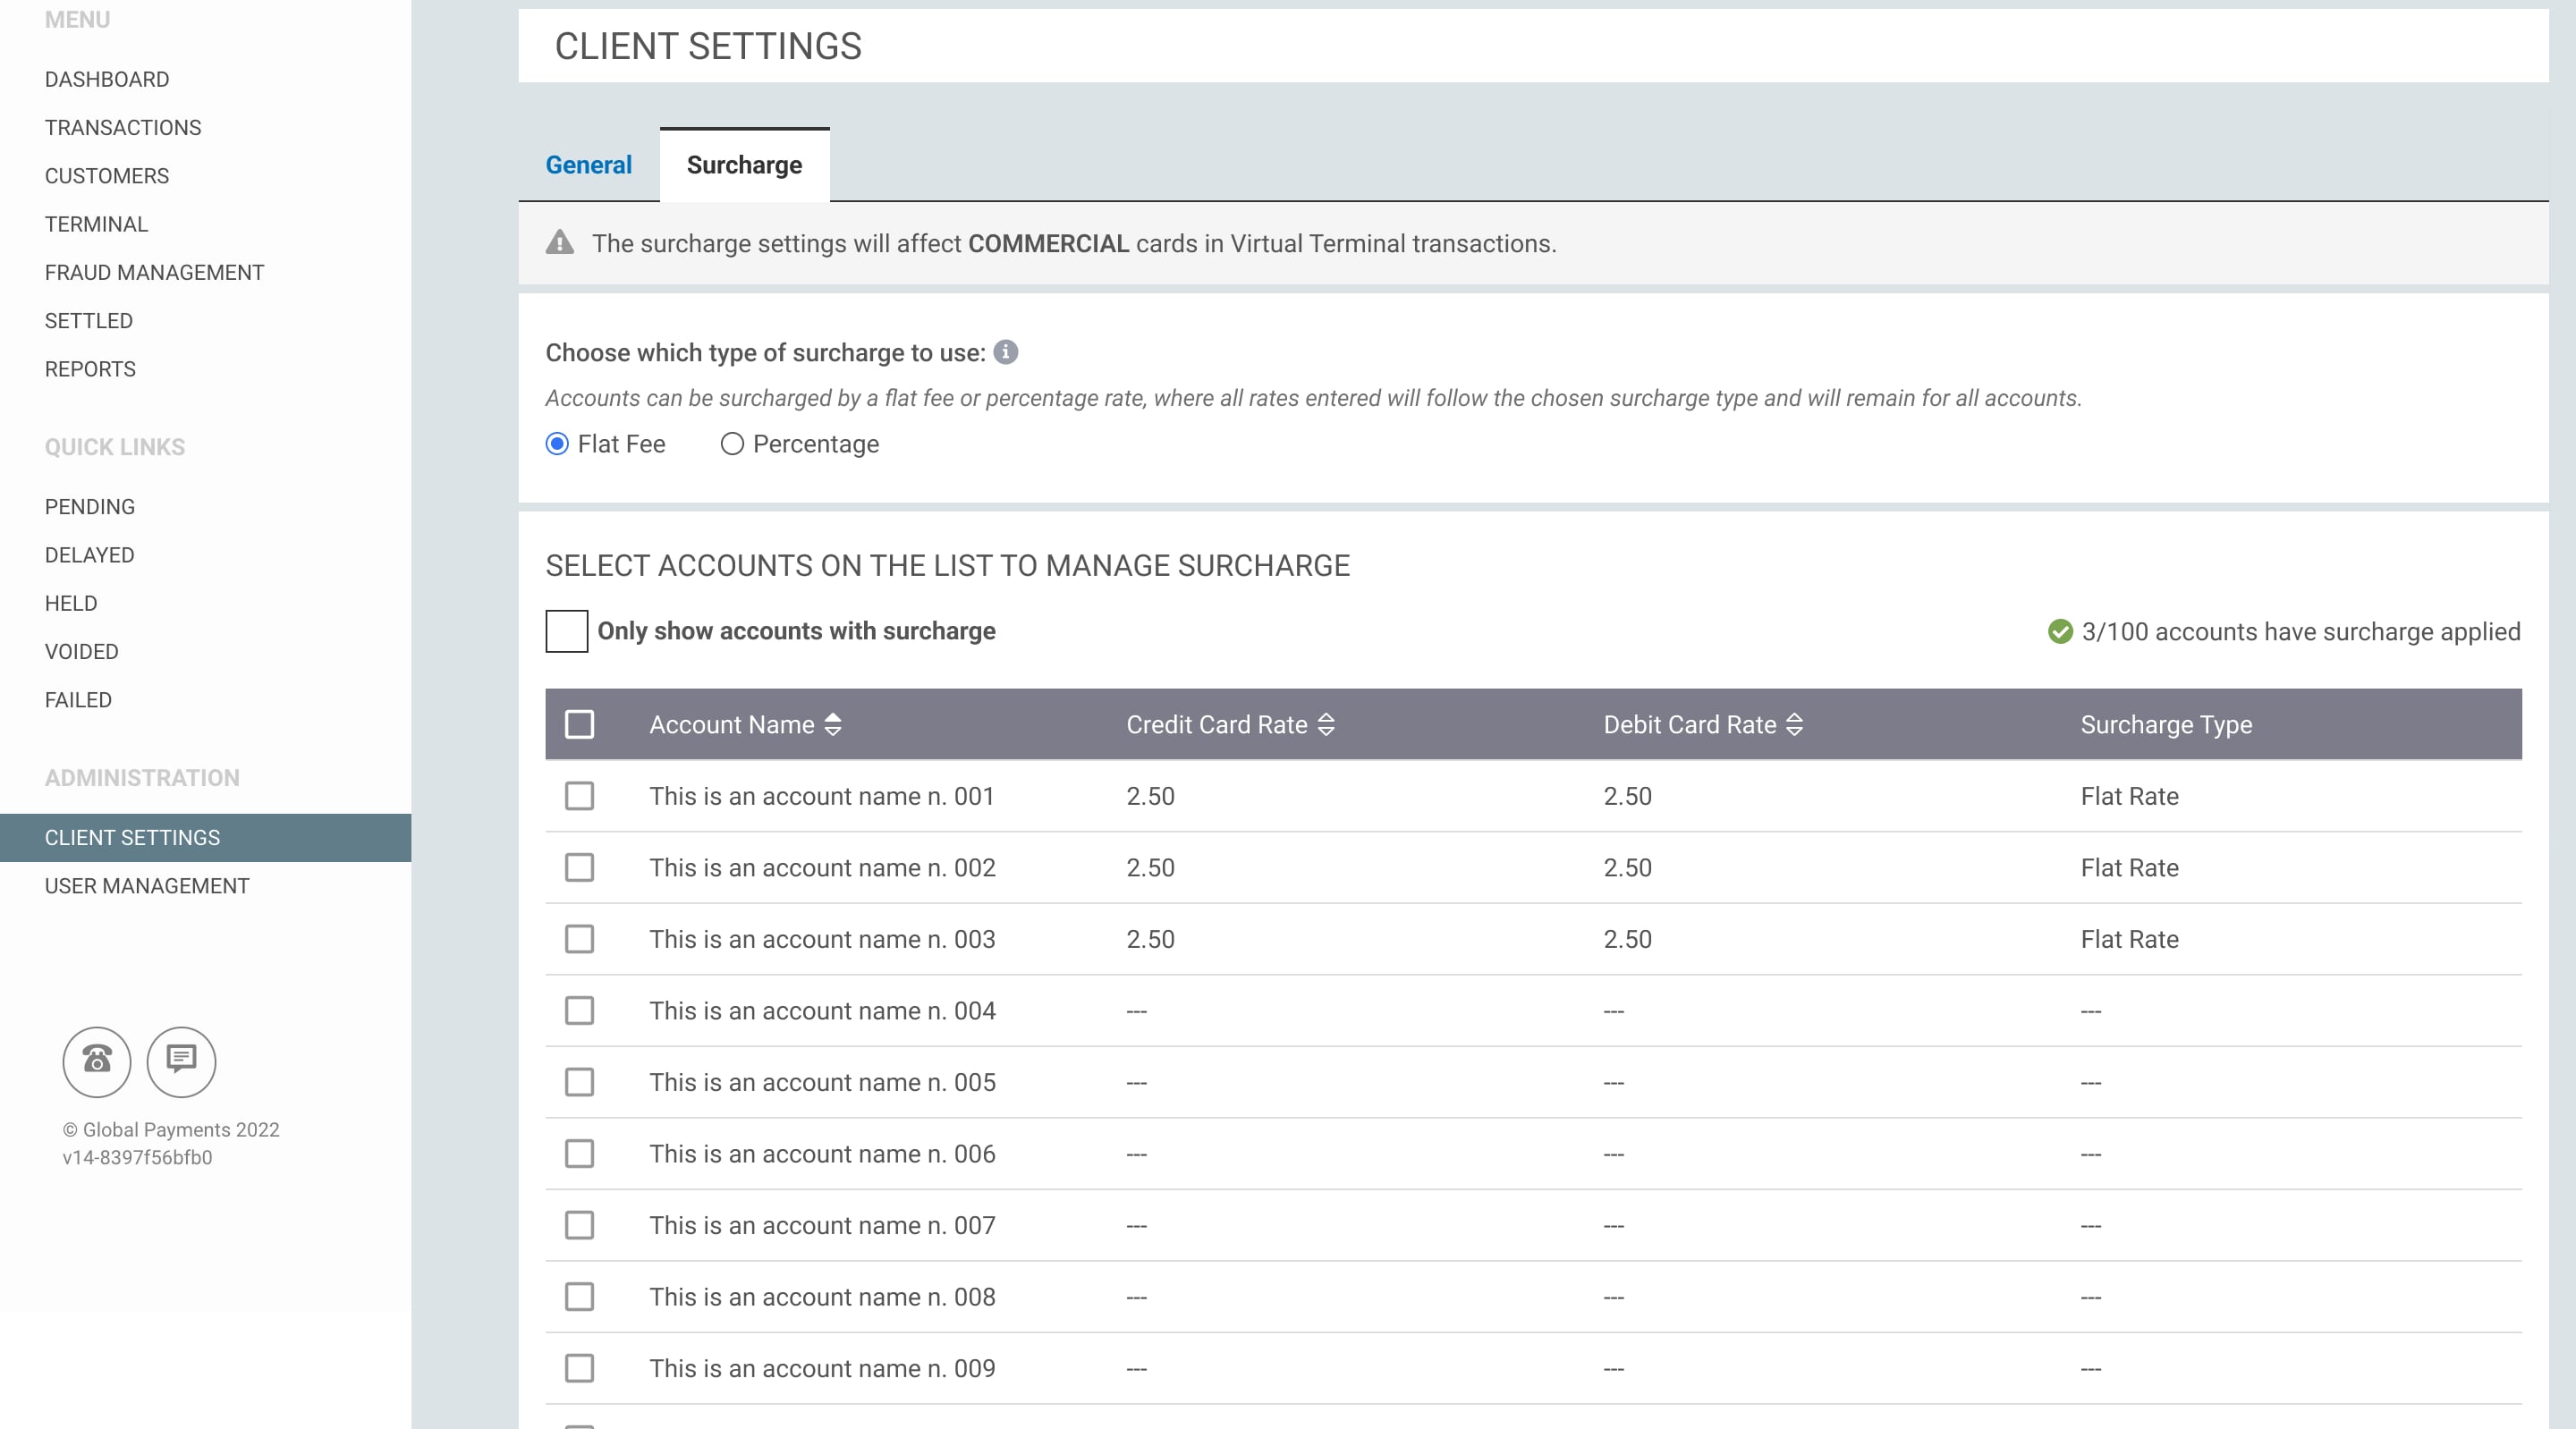
The surcharge will now be applied to the accounts you selected.
Editing surcharge amount
Your Virtual Terminal lets you apply a surcharge fee on commercial debit and credit cards. The surcharge fee you apply must always be less than the amount it costs you to accept the card transaction.
Step 1
To edit your surcharge percentage/flat fee amount, click on ‘Client Settings’ from the main navigation menu in RealControl and then click the ‘Surcharge’ tab.
Step 2
Select the accounts you want to apply the change to by clicking on the tick boxes on the left, then click 'Edit'.
Step 3
Enter the new surcharge amount into the fields ‘Credit Card’ and/or ‘Debit Card’ and click ‘Edit Surcharge’ to save.
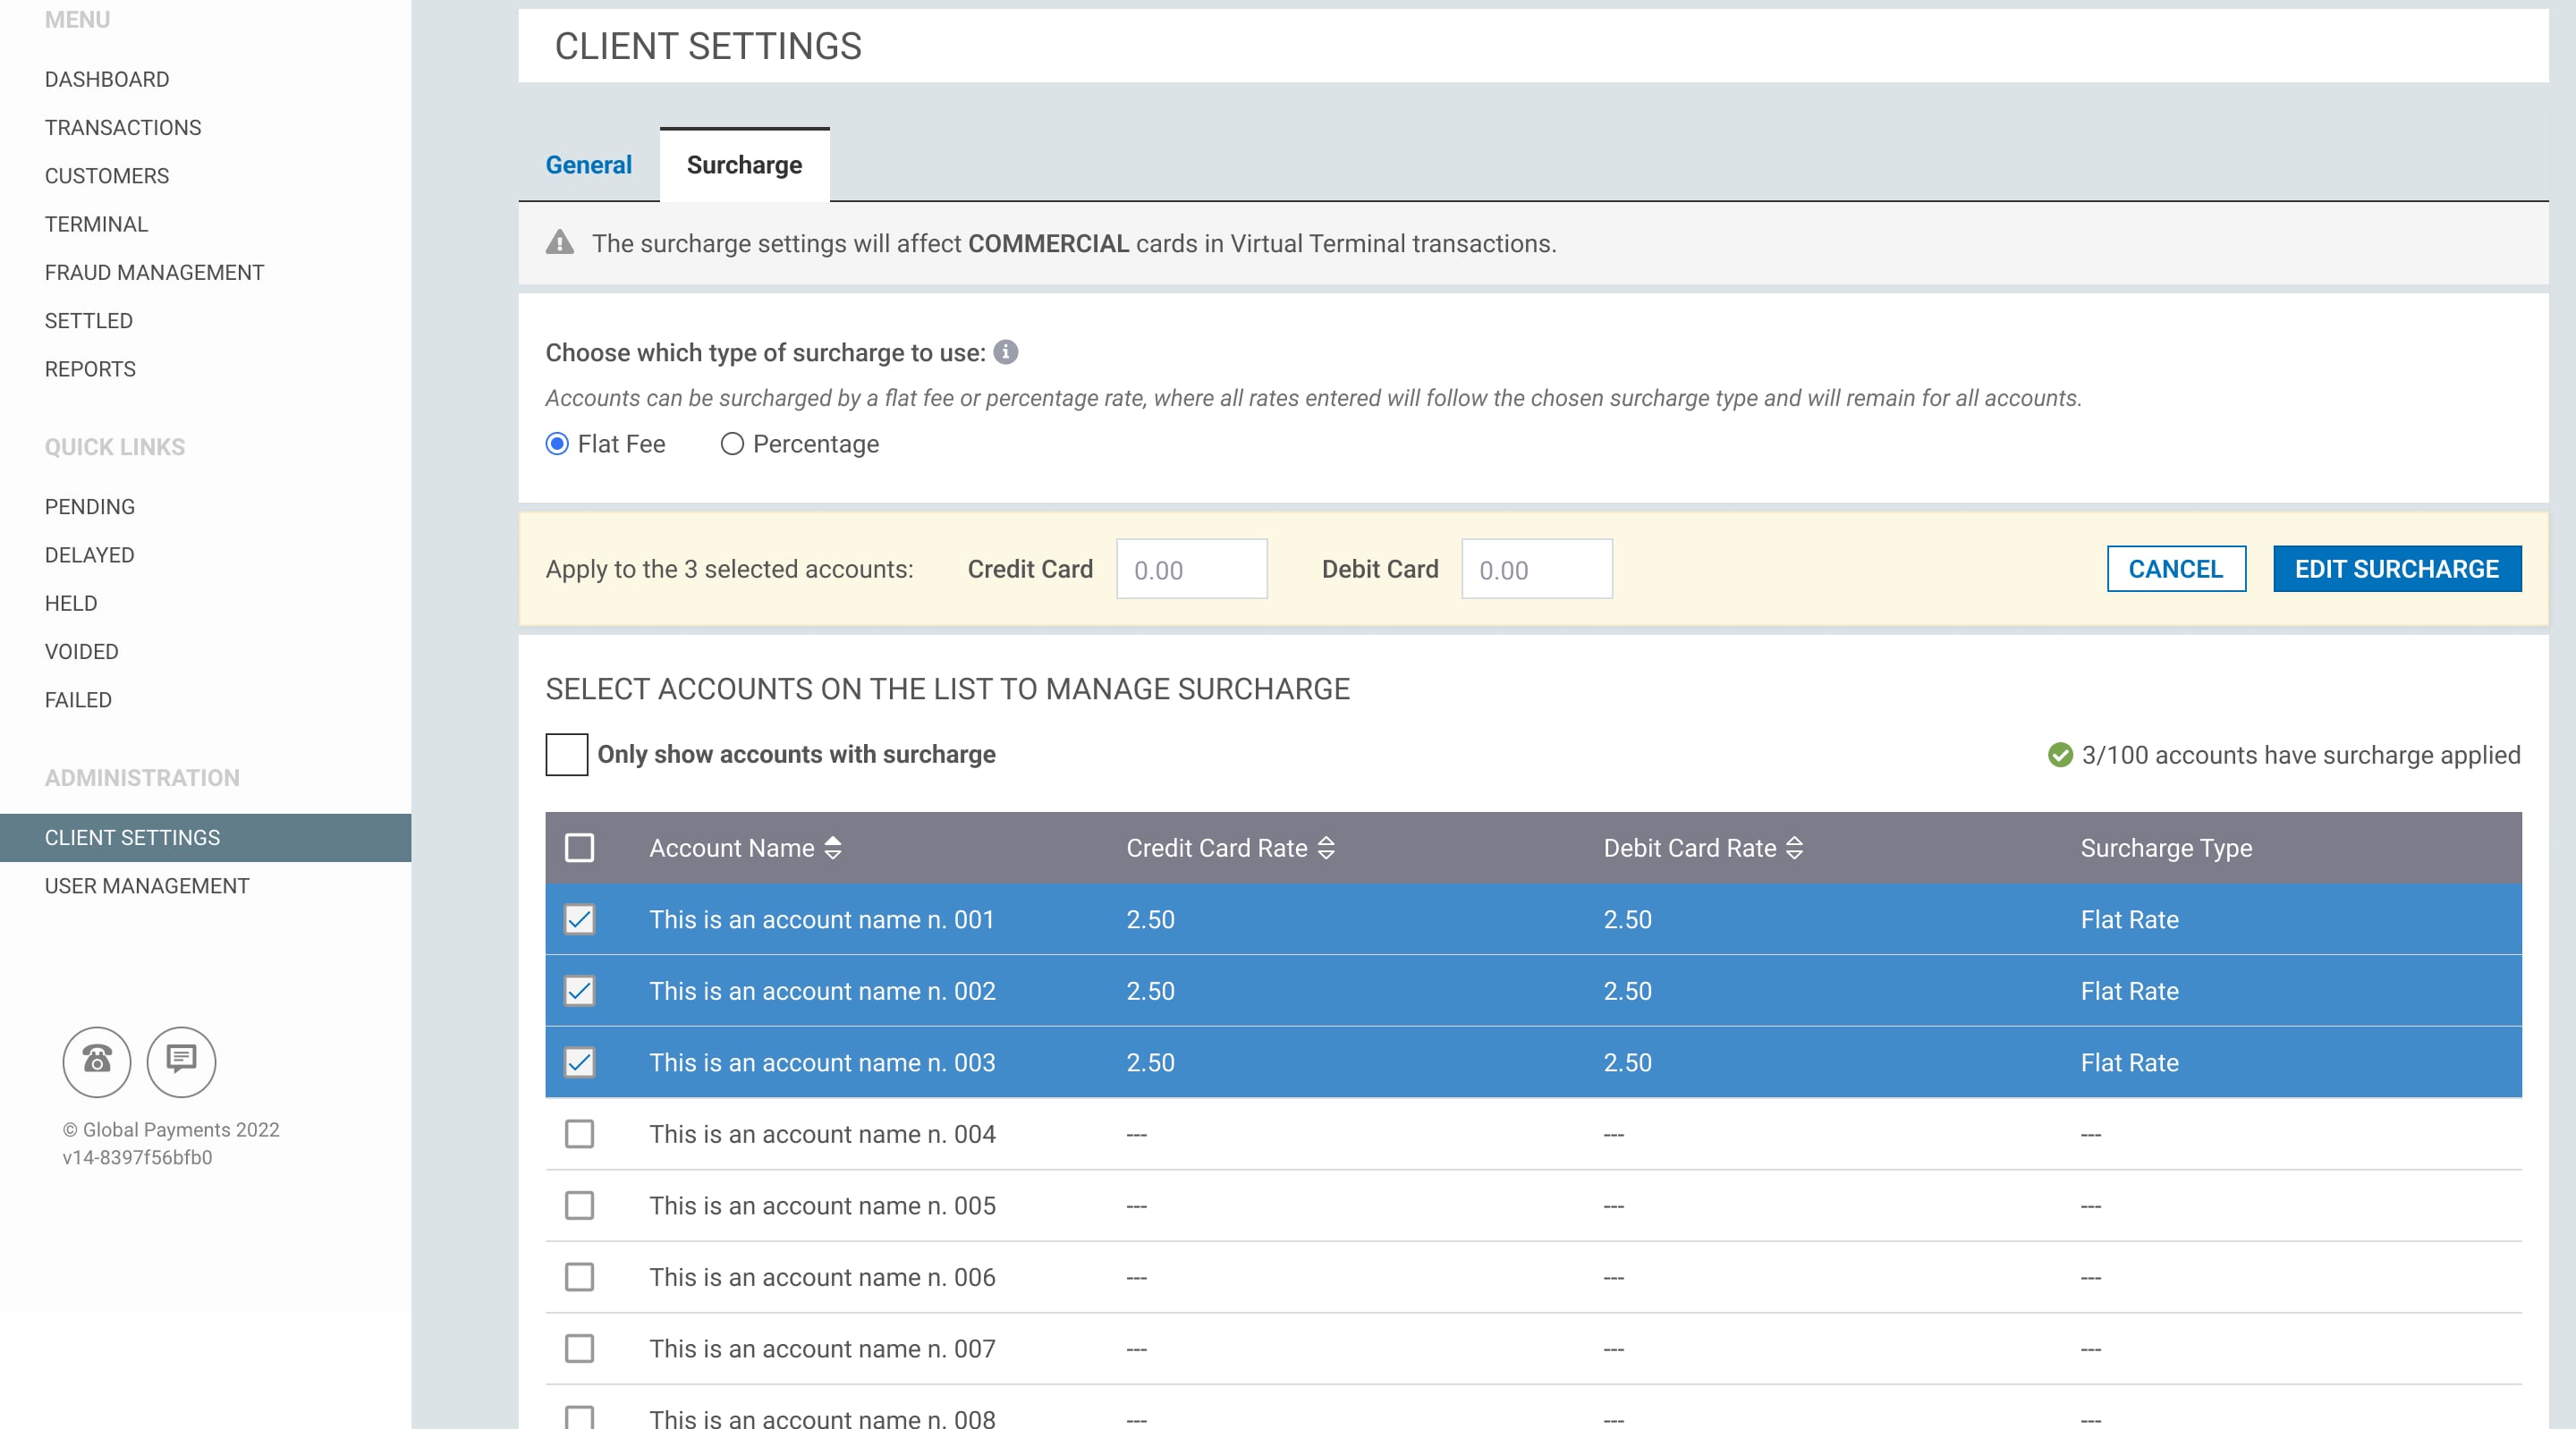
The new surcharge amount will now be applied to the accounts you selected.
Deleting surcharge amount
Your Virtual Terminal lets you apply a surcharge fee on commercial debit and credit cards. The surcharge fee you apply must always be less than the amount it costs you to accept the card transaction.
Step 1
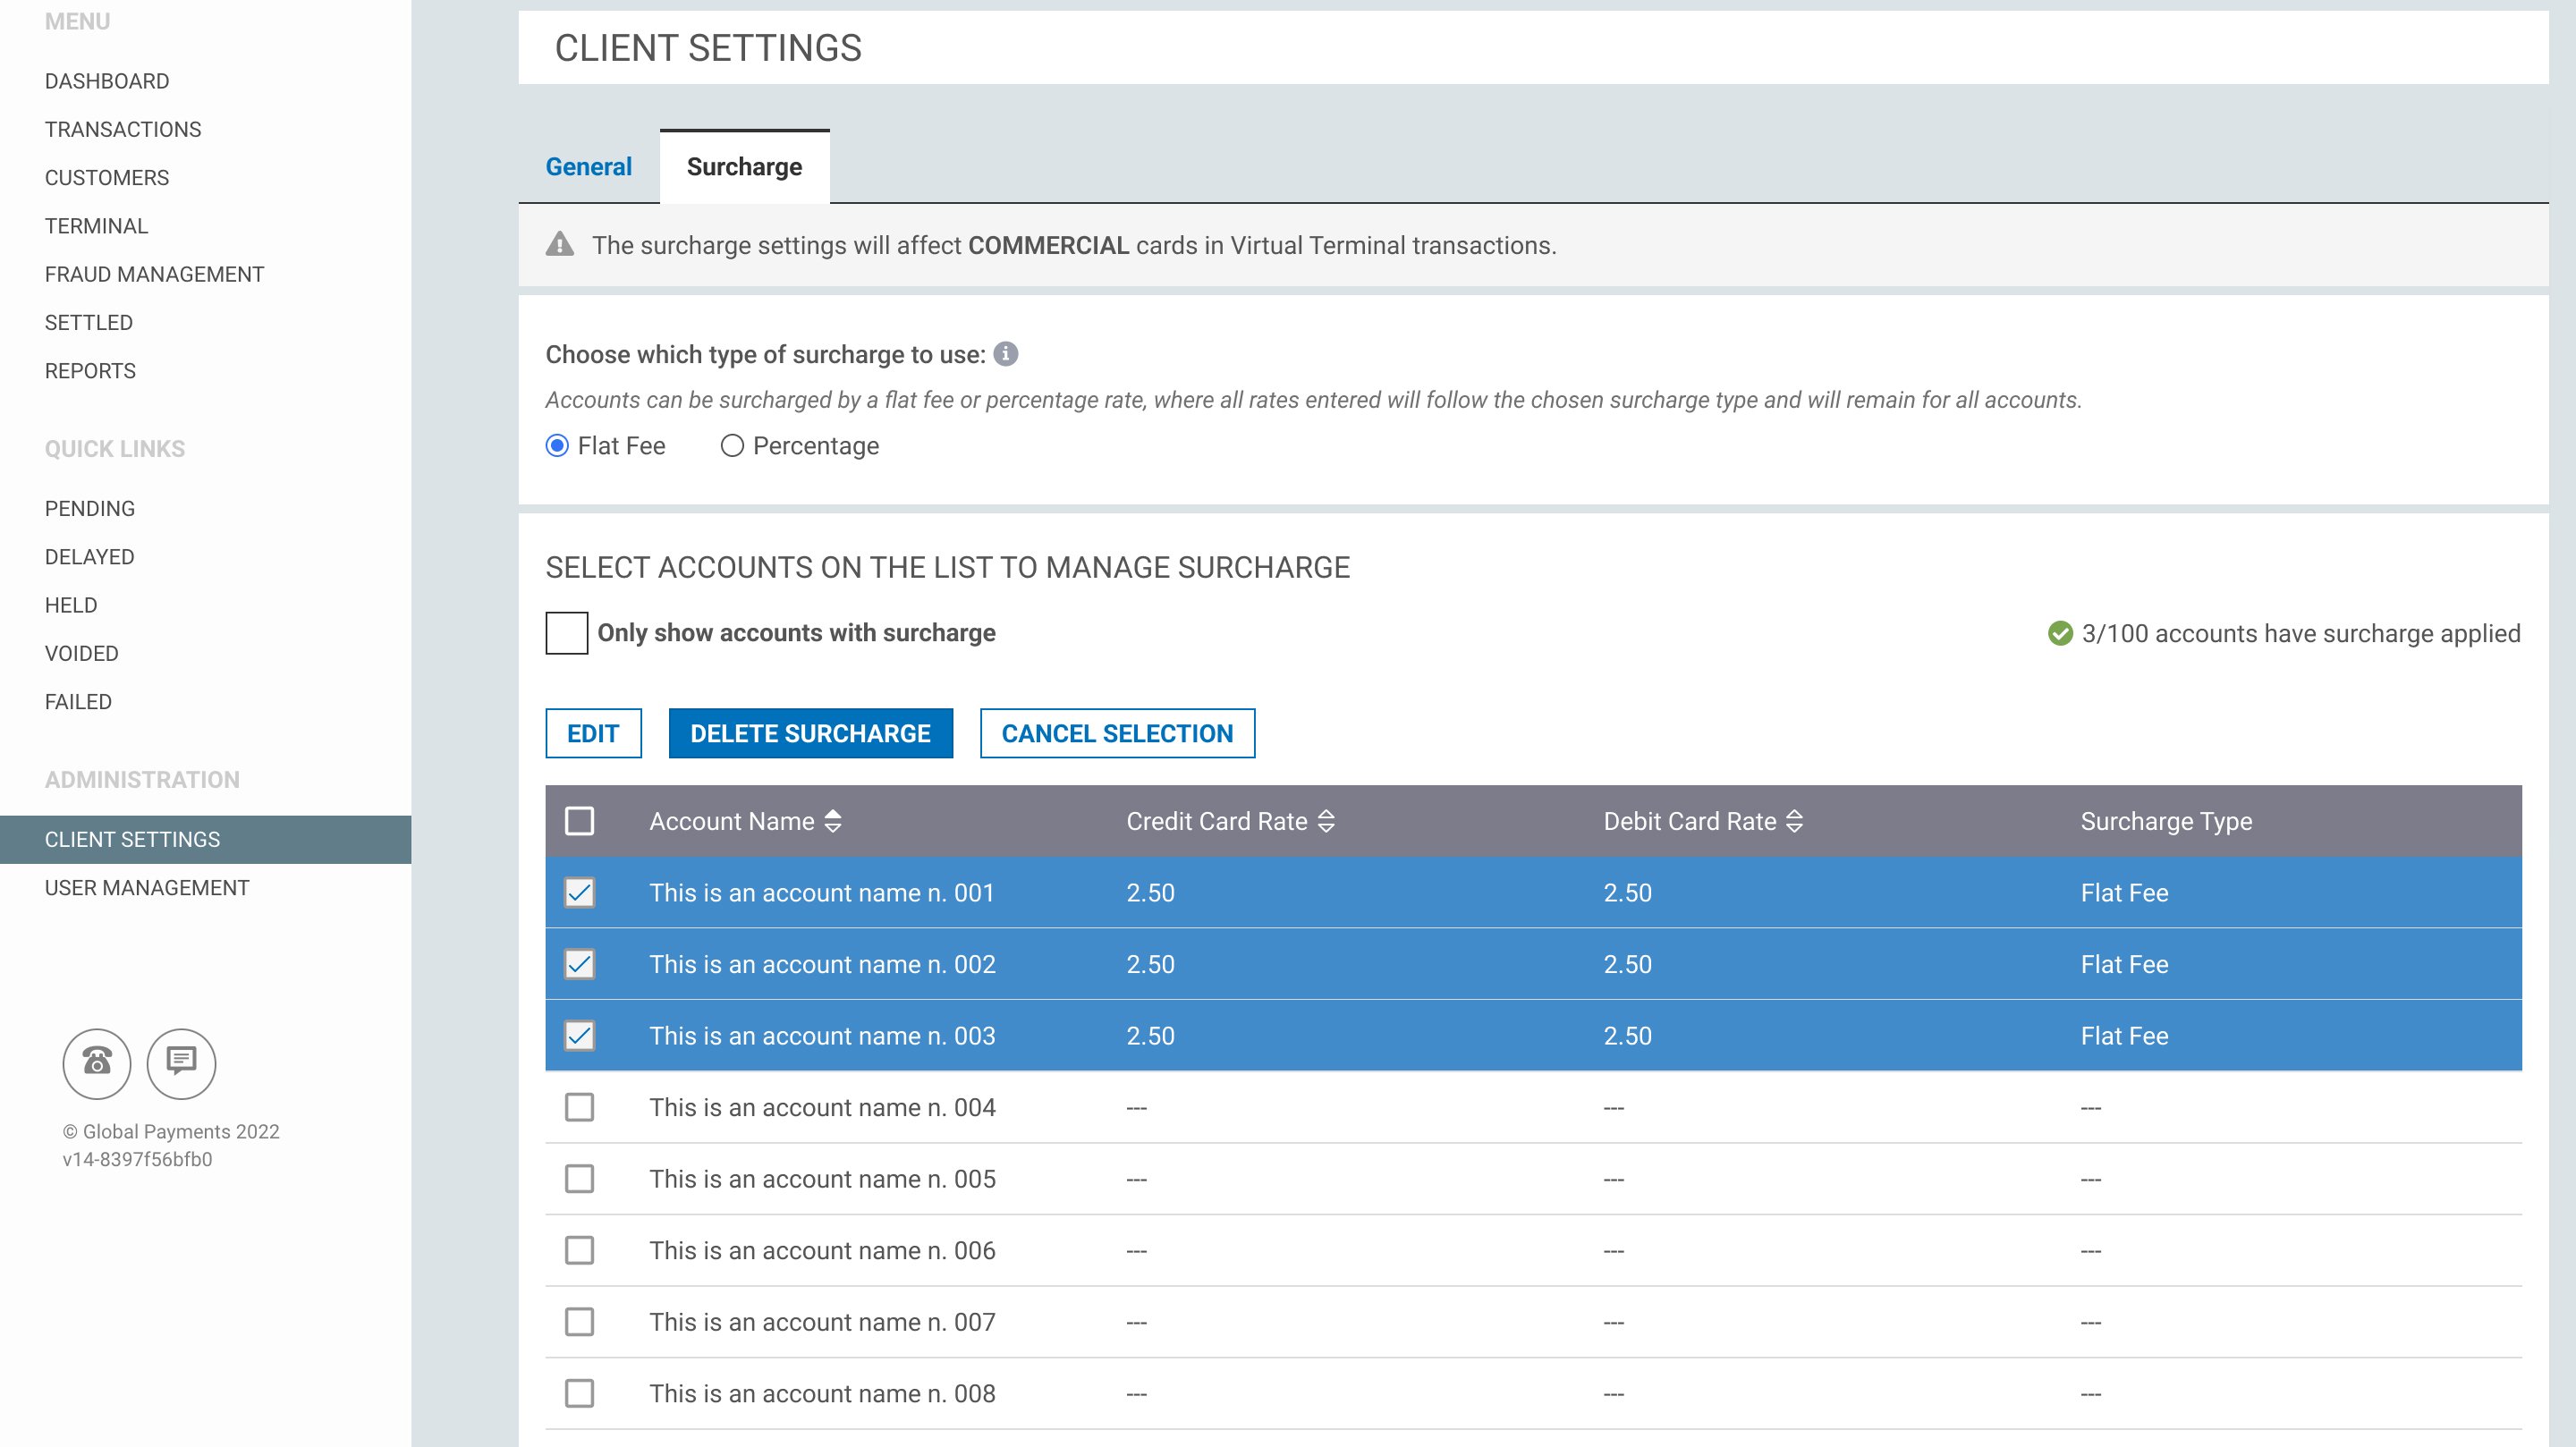
To delete your surcharge percentage/flat fee amount, click on ‘Client Settings’ from the main navigation menu in RealControl and click the ‘Surcharge’ tab.

Step 2
Select the accounts you want to delete the surcharge from by clicking the tick boxes on the left and click ‘Delete Surcharge’.
Step 3
You’ll then be asked to confirm you want to delete the surcharge, click ‘Yes, Delete’ to save.
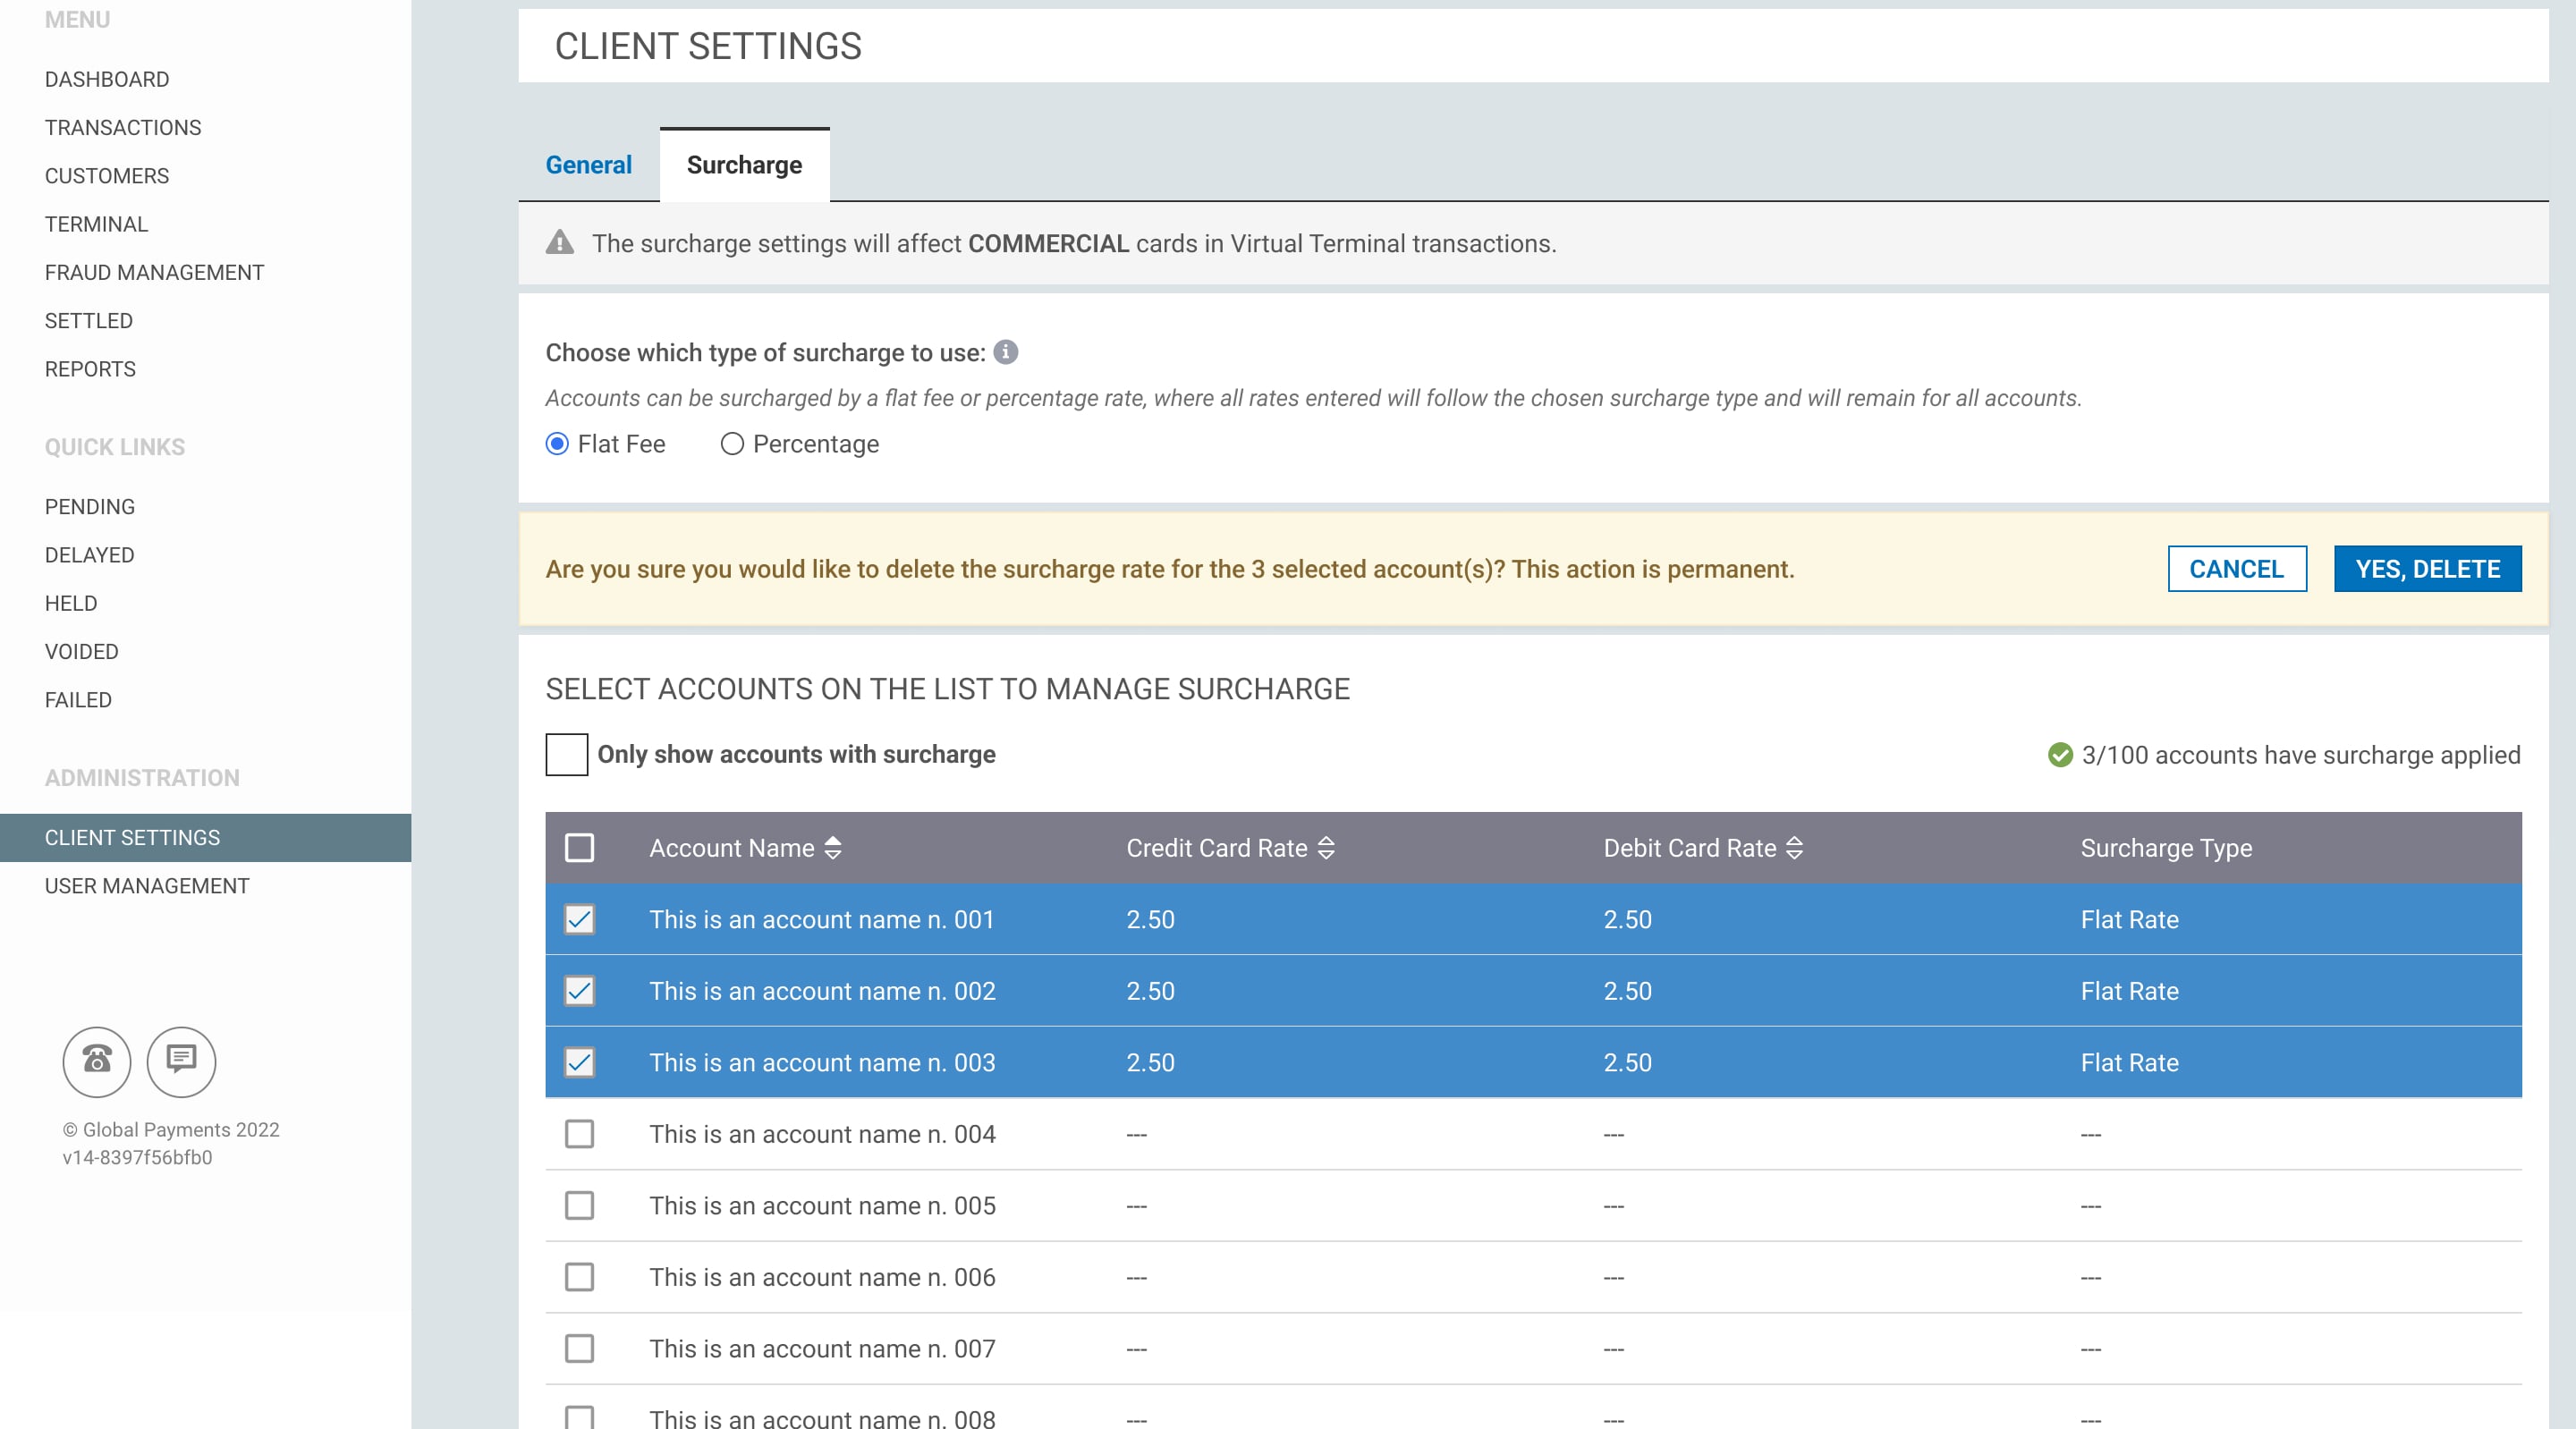
This will delete the surcharge amount on the selected accounts.
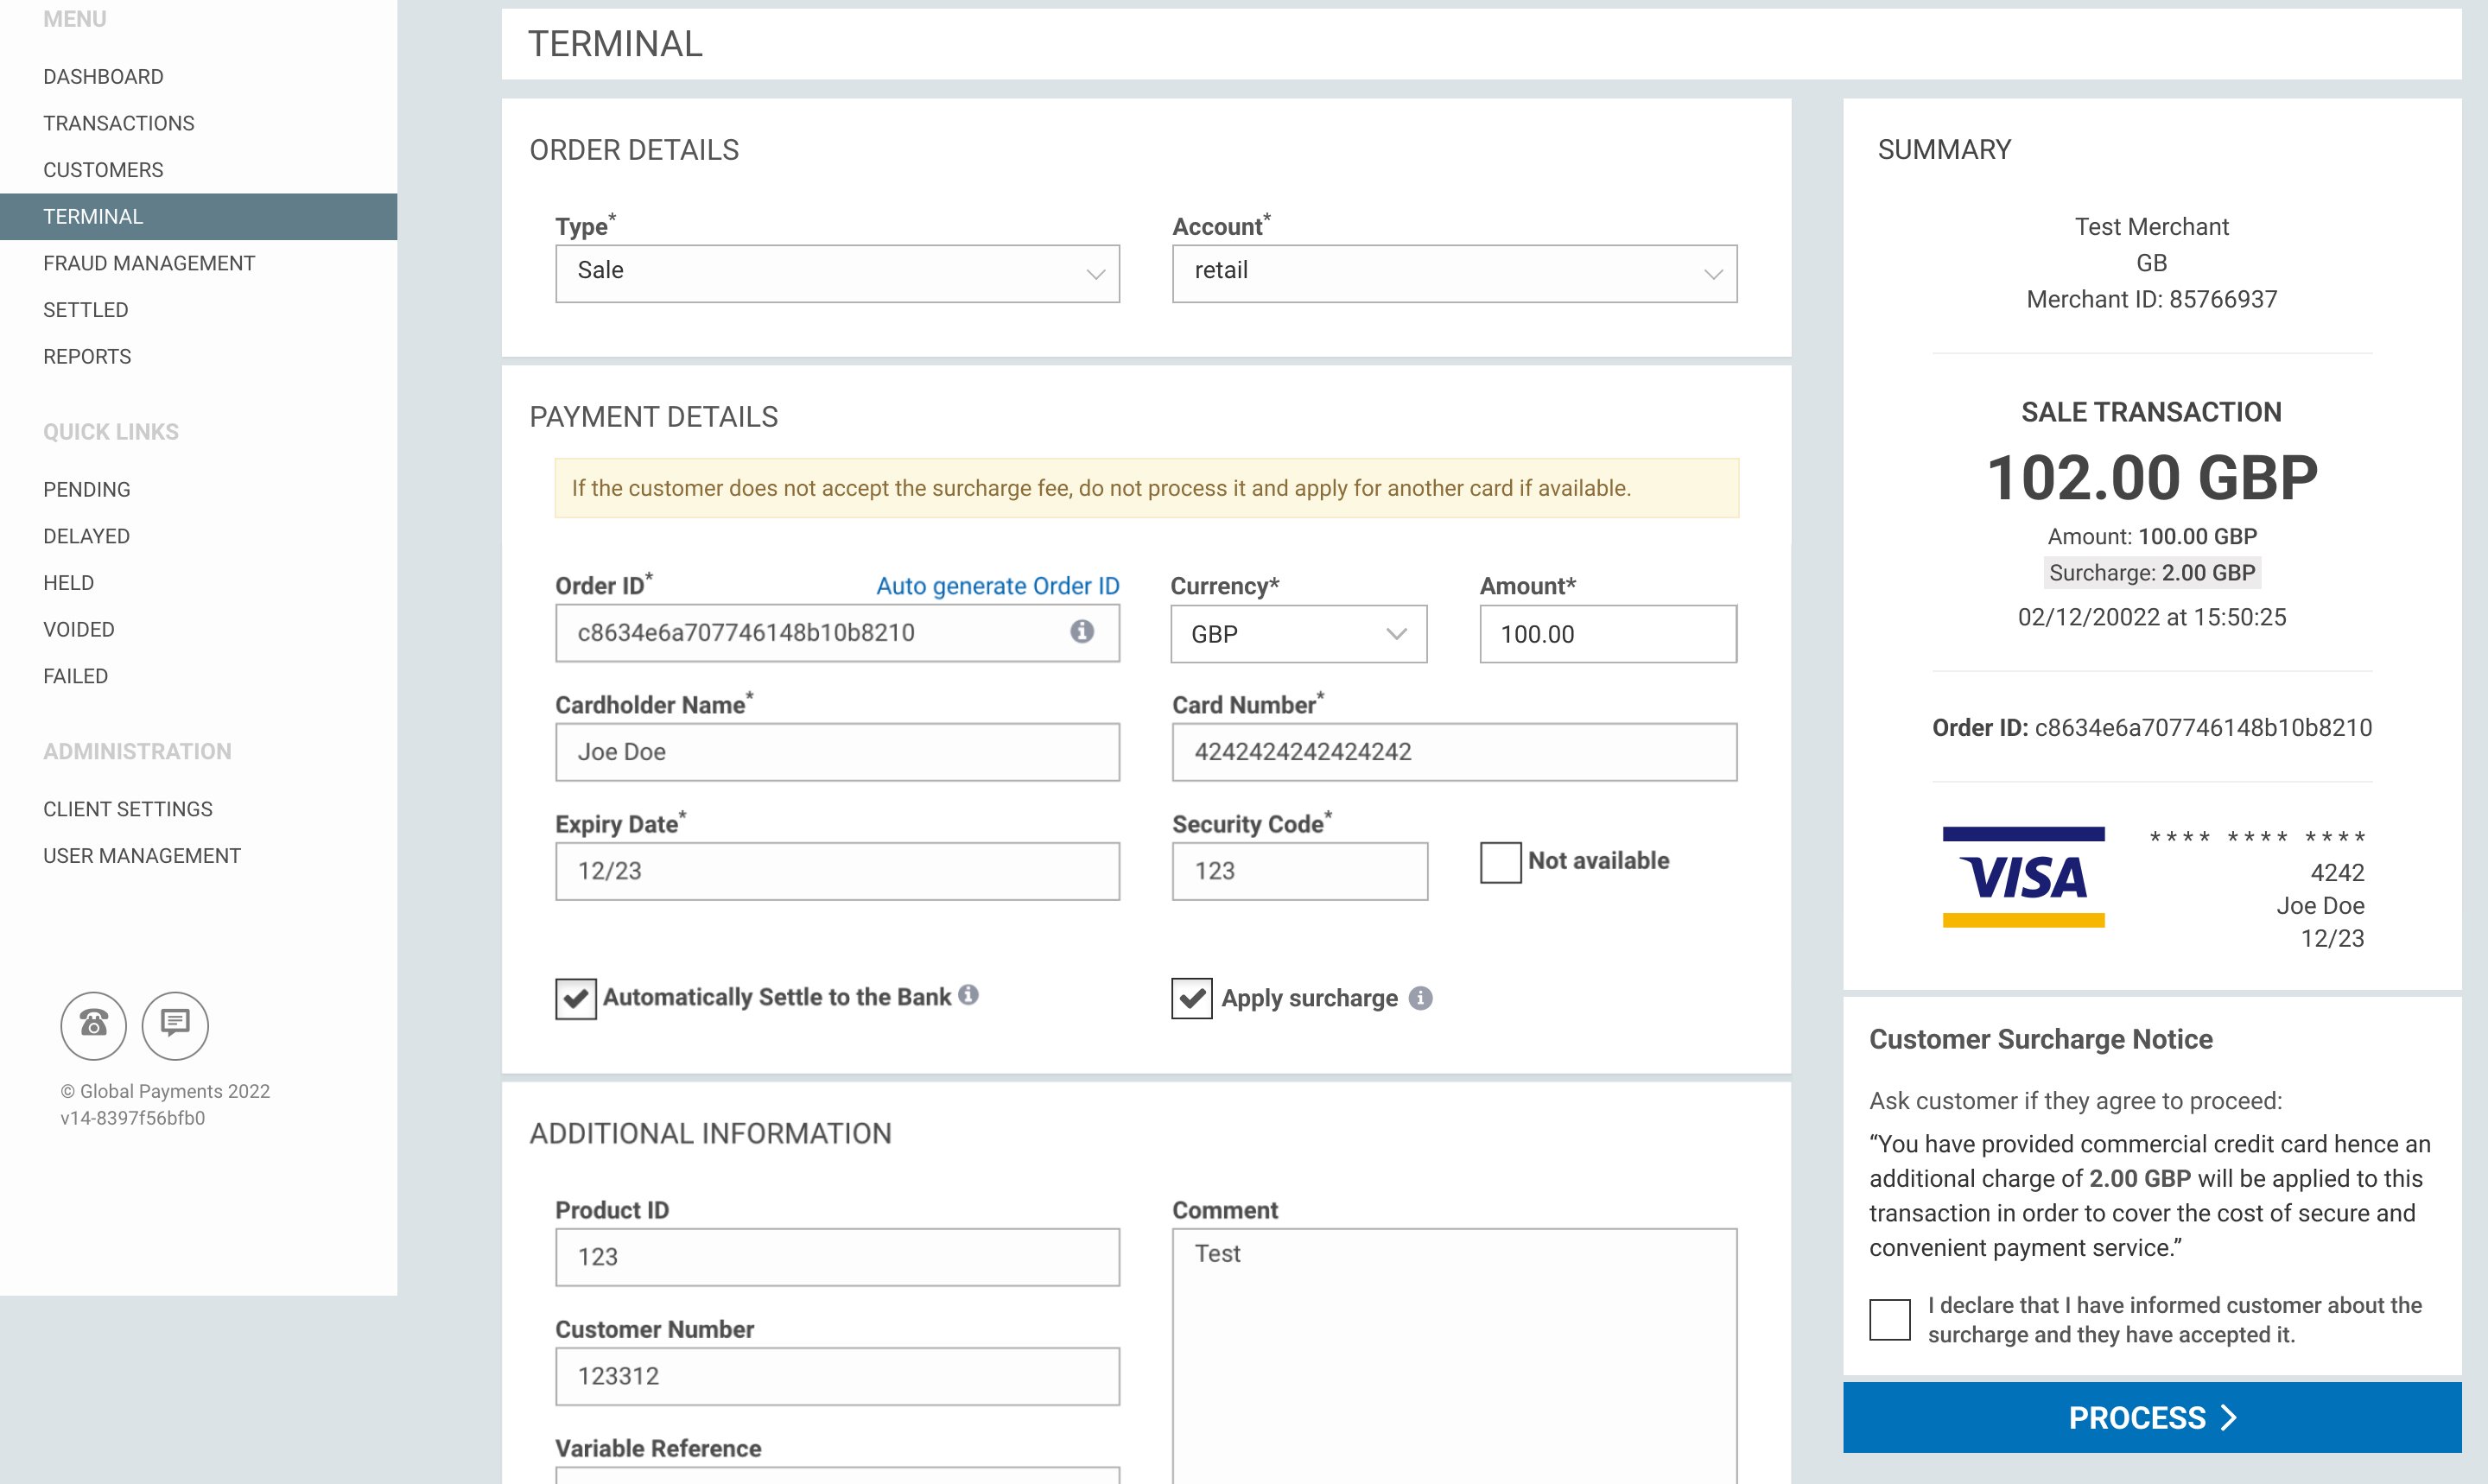
Overriding a surcharge
Your Virtual Terminal lets you apply a surcharge fee on commercial debit and credit cards. The surcharge fee you apply must always be less than the amount it costs you to accept the card transaction.
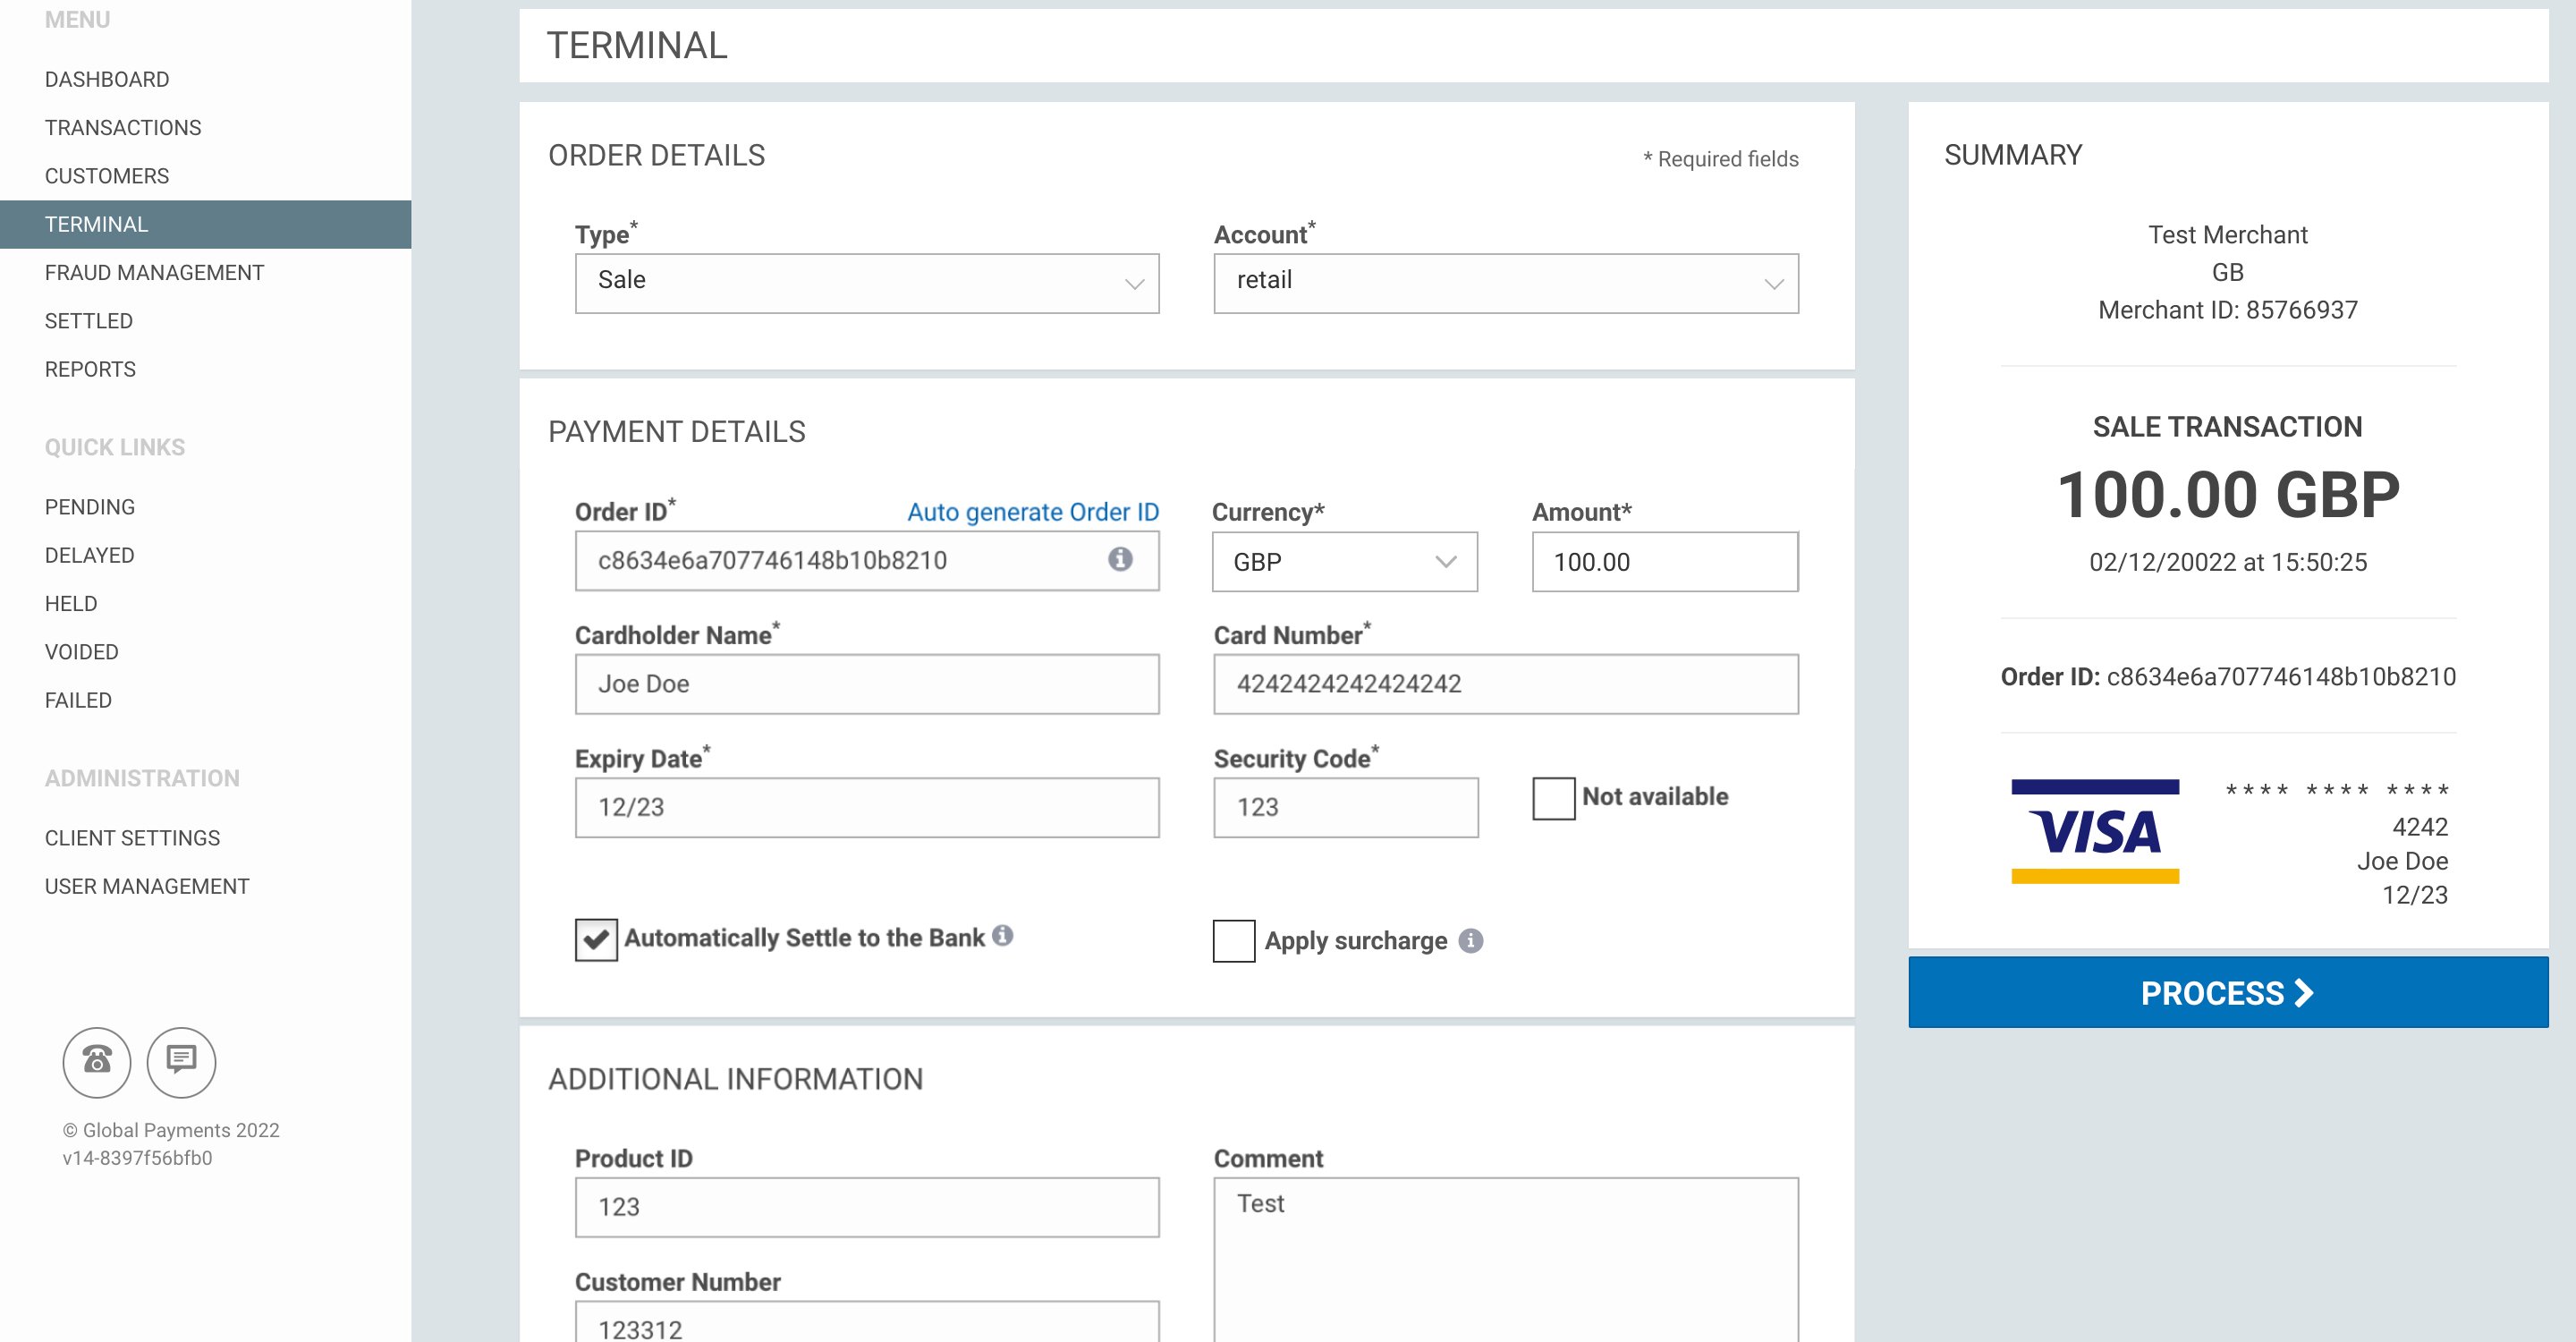
On Virtual Terminal you can override the surcharge amount if needed. When you get to the payment details section, the ‘Apply surcharge’ box will be ticked as default.
To remove the surcharge fee, you’ll need to untick the ’Apply surcharge’ box and the surcharge amount will then be removed from the summary area.
Change surcharge type
Your Virtual Terminal lets you apply a surcharge fee on commercial debit and credit cards. The surcharge fee you apply must always be less than the amount it costs you to accept the card transaction.
Step 1
To change the surcharge type when there is a surcharge already applied click on ‘Client Settings’ from the main navigation menu in RealControl and click the ‘Surcharge’ tab.

Step 2
To change the surcharge type, all previously applied rates must be set to null. To do this, select the surcharge type you’re changing to-flat fee or percentage. You’ll then be alerted that this change is permanent and will affect all accounts. Click ‘Yes, reset and change type’ to save changes.
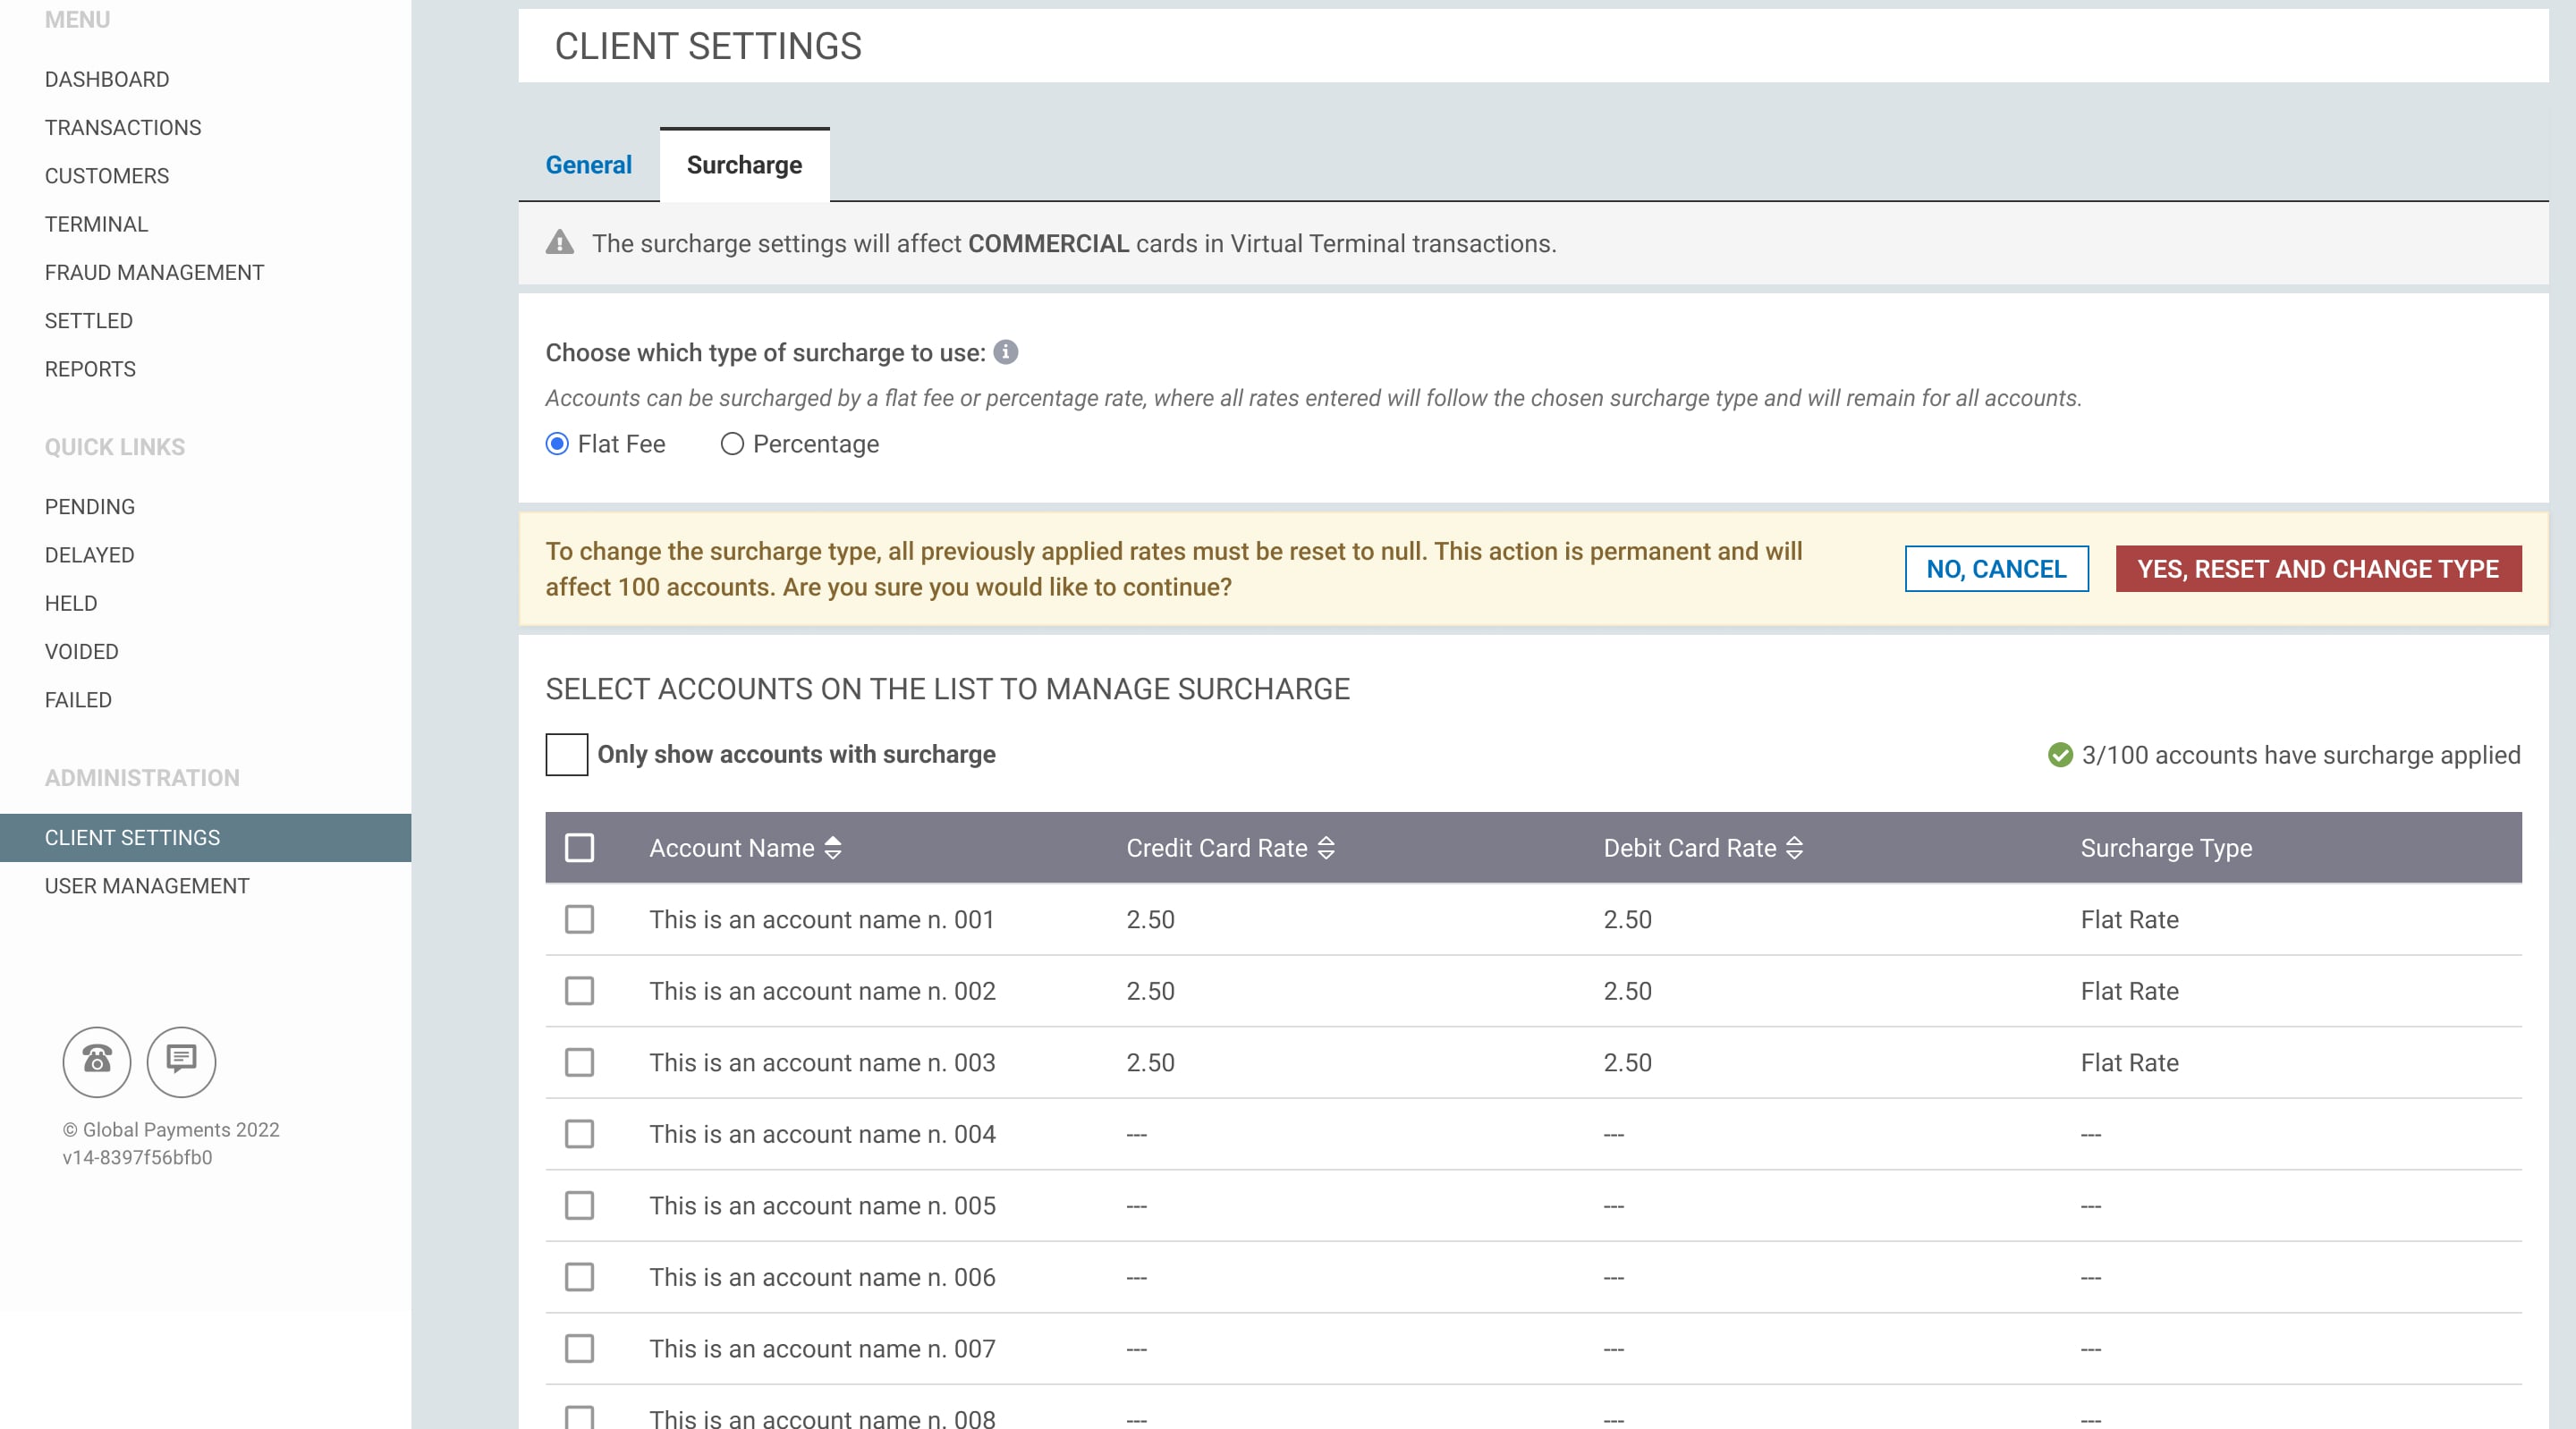
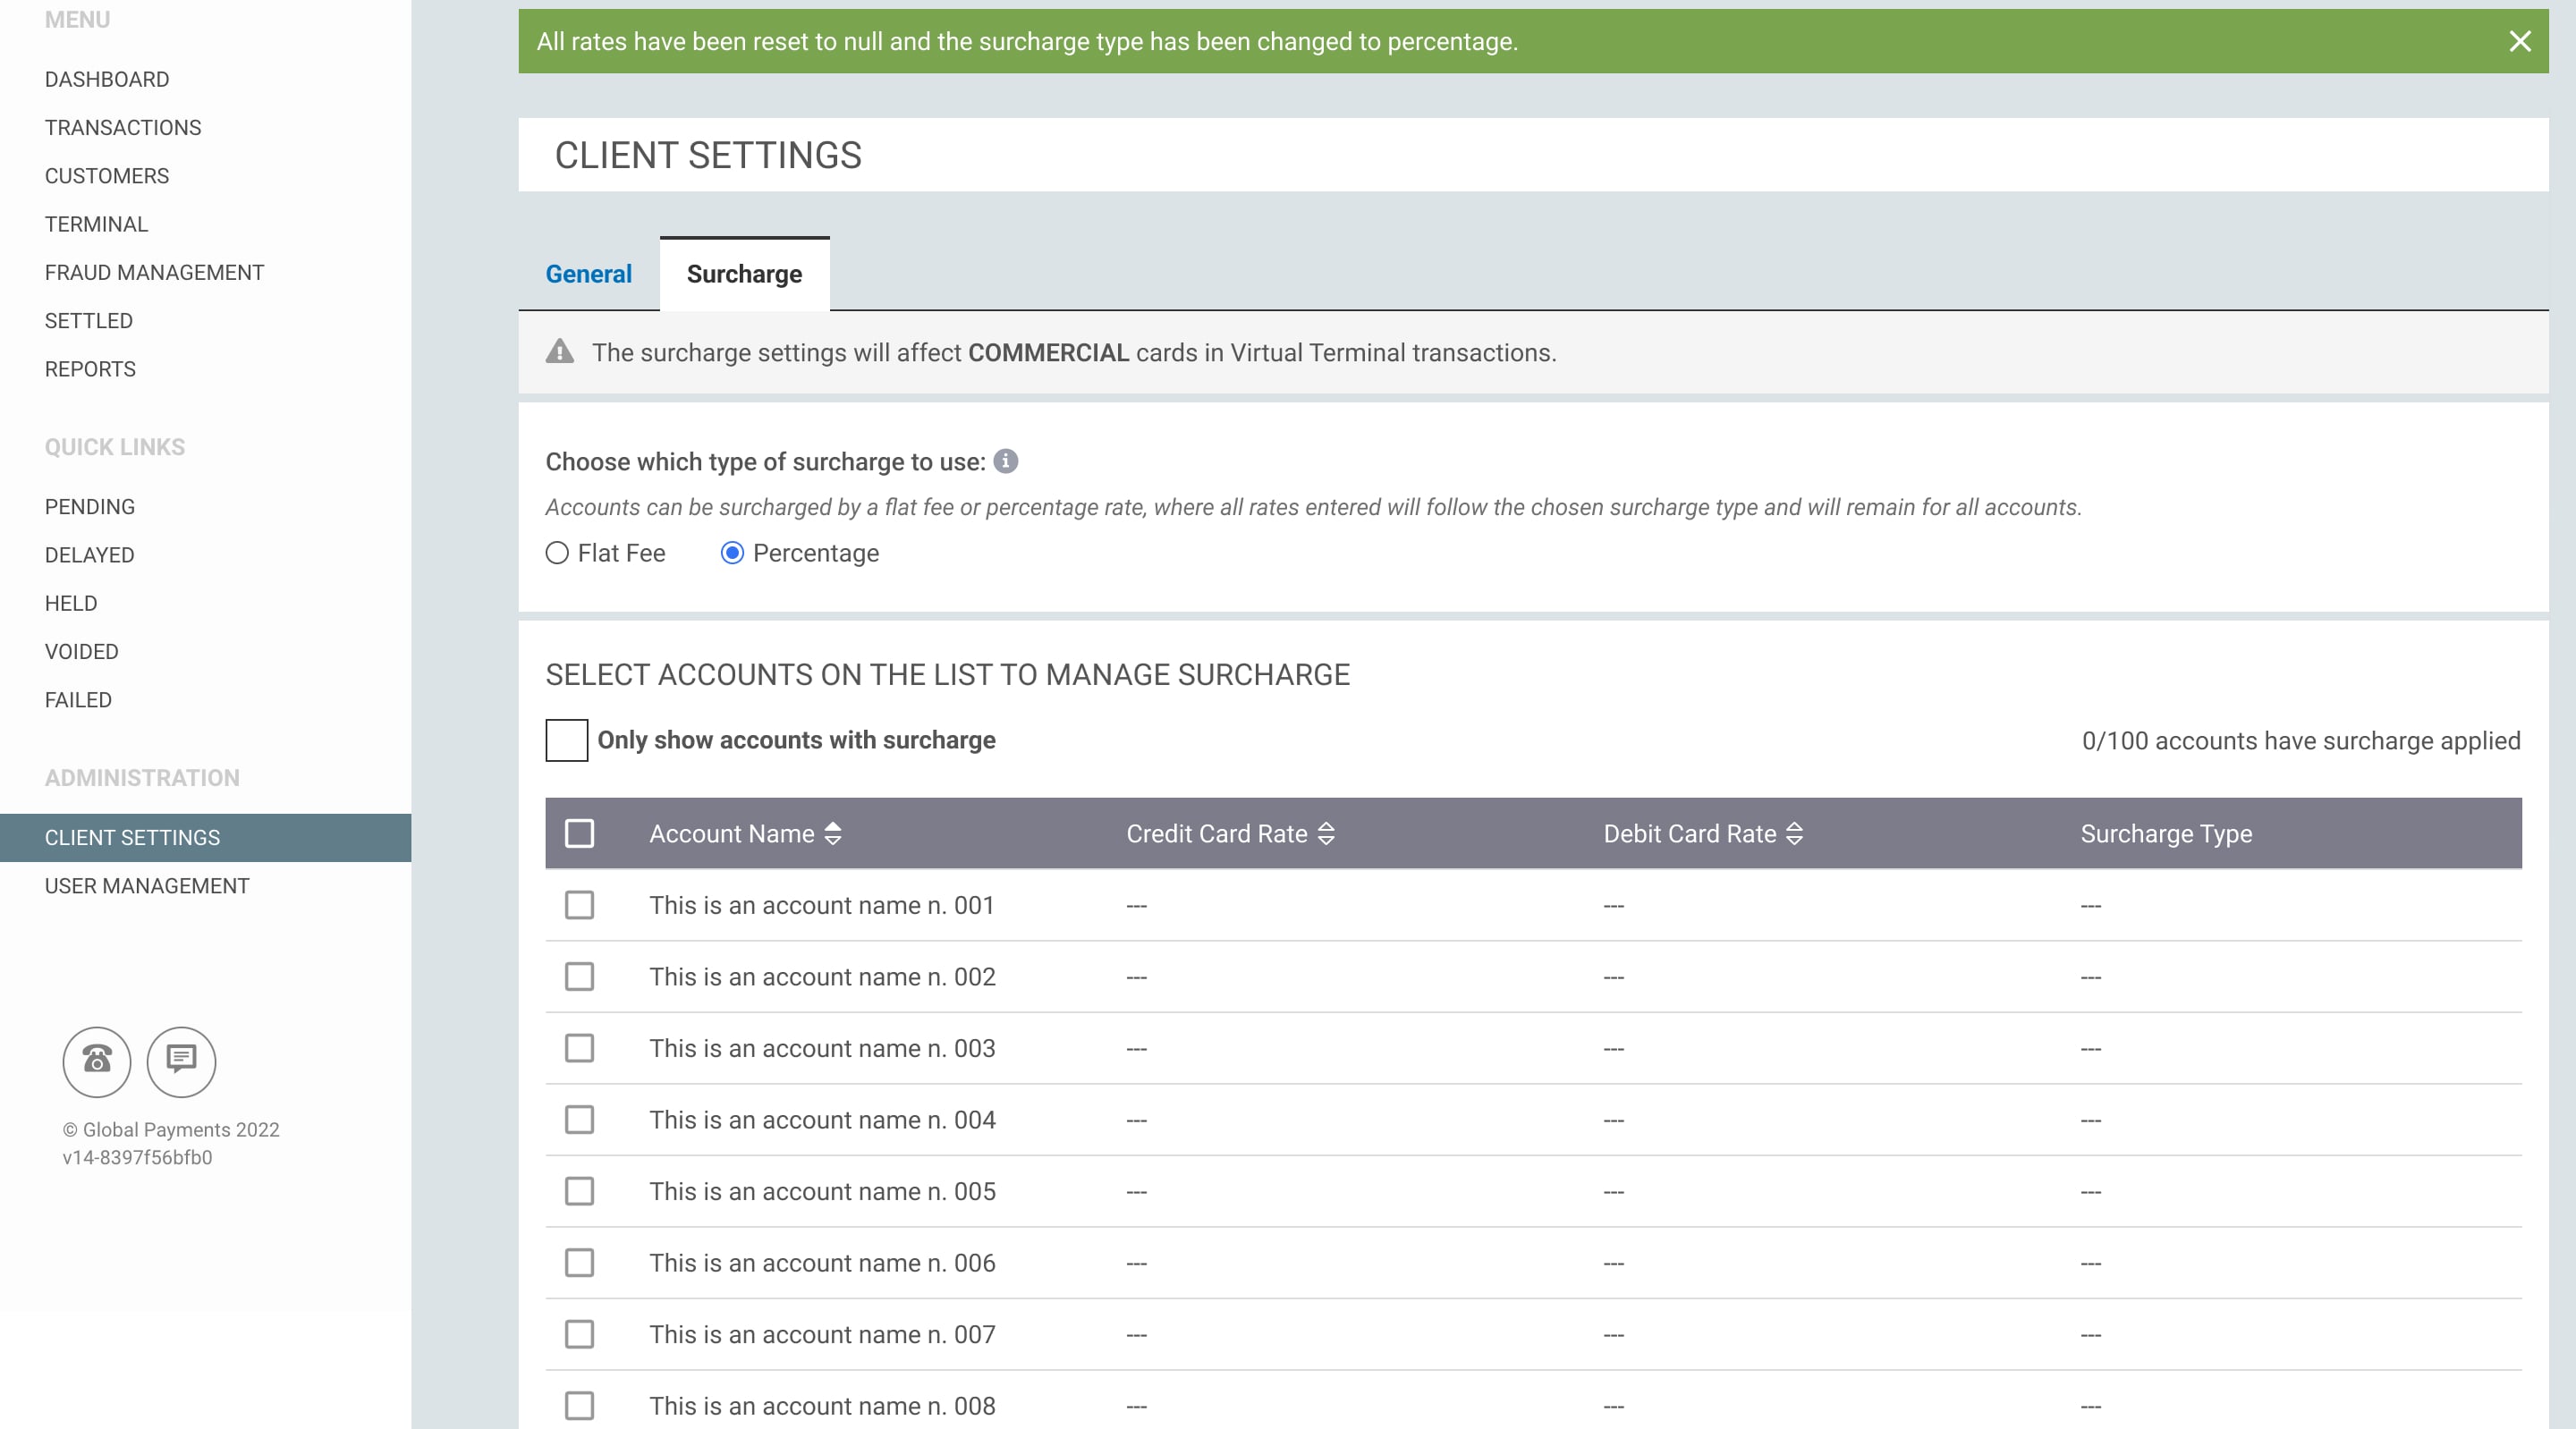
All rates have been reset to null and the surcharge type now changed.
Explanation of terminal fields
|
Field |
Description |
Format |
Length |
|---|---|---|---|
|
Order ID |
The Order ID must always be unique. For example, an invoice number can be used or a unique reference for the transaction. |
a-z A-Z 0-9 _- |
1-40 |
|
Amount |
The amount must never contain decimal places; it is in cent value i.e. to process 10.00, type 1000 for ALL currencies. |
0-9 |
1-8 |
|
Card Number |
The card number. |
0-9 |
12-19 |
|
Customer Name |
The card holder name. |
a-z A-Z 0-9 “” ‘_ |
1-100 |
|
Security Code |
Security code is the 3 digit number on the back of the card. If you don’t have this you can select “No Code”. |
0-9 “” |
3-4 |
|
Comment 1 |
Free text field; can be used to store information that will be relevant for your own reconciliation/reporting purposes. |
a-z A-Z 0-9 ‘ “,+ “”._-&\ /@ ! ? % () * : £ $ & € # [ ] | = |
0-255 |
|
Customer Number |
Free text field; can be used to store information that will be relevant for your own reconciliation/reporting purposes. |
a-z A-Z 0-9 – “” _ . , + @ |
0-50 |
|
Product ID |
Free text field; can be used to store information that will be relevant for your own reconciliation/reporting purposes. |
a-z A-Z 0-9 – “” _ . , + @ |
0-50 |
|
Variable Ref |
Free text field; can be used to store information that will be relevant for your own reconciliation/reporting purposes. |
a-z A-Z 0-9 – “” _ . , + @ |
0-50 |
|
Shipping Code |
Enter the Address Verification Service (AVS) shipping code. |
a-z A-Z 0-9“”, . - / | |
0-30 |
|
Shipping Country |
Select the shipping country from the drop down. |
Predefined |
Predefined |
|
Billing Code |
Enter the Address Verification Service (AVS) shipping code. |
a-z A-Z 0-9“”, . - / | |
|
|
Billing Country |
Select the billing country from the drop down. |
Predefined |
Predefined |